Using the New Stromasys Secure File Server
![]()
Table of contents
Introduction
On Thursday, , Stromasys switched to a new, secure, file server. The new file server supports the SFTP (Secure File Transfer Protocol), and no longer supports the FTP protocol.
You can manage your account using any modern web browser by visiting this link.
For account access (up- and downloading files), you will need an SFTP client (see below).
Prerequisites
- SFTP Client
- Port 22 must be allowed to traverse your firewall, if you have one
SFTP is required
You will need an SFTP client. On Windows, Stromasys has tested FileZilla and WinSCP.
On Linux, you can use FileZilla, or the "sftp" command-line utility which is part of the openssh-clients package.
Configuring your SFTP client
Use the following parameters:
| Parameter | Value |
|---|---|
| Host Name | fileserver.stromasys.com |
| Protocol | SFTP (not FTP) |
| Port | 22 |
| Username | your username |
| Password | your password |
![]() Username and Password are case sensitive
Username and Password are case sensitive
See below for configuration details for FileZilla and WinSCP.
Transferring Files
After you have successfully connected, you will find yourself in your home directory on the remote host.
Both FileZilla and WinSCP split the window into two halves. The left half is a view of folders and files on the local host (your PC), and the right half is a view of folders and files on the remote host. By default FileZilla has separate folder and file "panes" for both local and remote views, while WinSCP has a single combined folder/file pane for each side.
The usual procedure for copying a file to the server is to navigate to the local folder (left side) holding the file(s) to be copied, then navigate to the remote folder (right side), then pick up the file on the left side and drop it on the right side into the file pane (if using FileZilla). To copy a file from the server, simply drag and drop from right to left.
Use Compression and an Archiver to Insure Data Integrity
File can become corrupt due to various causes when transferring them to and from Stromasys.
Stromasys requests that you create a compressed archive of files that you wish to transfer to the Stromasys file server. An archive is a single file which can contain one or more files. Typically, archives use check-sums internally to detect data corruption.
Compressing large files is good for both you and Stromasys. It saves space on our file server, and it reduces the time it takes to transmit the files over the Internet.
Creating an Archive on Windows
- the "zip" archive format is built into modern Windows versions
- the "7-zip" utility does good compression, offers strong encryption (AES) and integrity checking, and is open-source: http://7-zip.org/
Creating an Archive on Linux
Use the combination of "tar" and "gzip":
- separately: tar cf - <files> | gzip > archive-name.tar.gz
- using tar-option "z": tar czf archive-name.tar.gz <files>
Using a Check-Sum to Check Integrity
It is standard practice to generate a so-called "cryptographic hash" check-sum before and after transferring a file in order to check its integrity. On Windows, the "quickhash" utility (http://sourceforge.net/projects/quickhash/) can be used to calculate MD5, SHA256 (among others) check-sums. On Linux, the "md5sum" and "sha256sum" commands can be used for this.
If you put the files in a "zip", "7-zip" or "gzip" archive, you do not need to use cryptographic hash check-sums – the archivers do that for you.
Account Management
When your account is created a notification e-mail will be sent to the address that you provided. The notification e-mail contains a link that you must follow in a web-browser. This link expires after 24 hours and can only be used once. It takes you to an initial-login page on our file-server and allows you to set your password for the account. Please use a secure password and keep it private.
You can manage your password, e-mail address and SSH keys by going go https://fileserver.stromasys.com in a browser and logging in using your username and password.
Change E-mail Addresss
Click on the "EDIT PROFILE" button. This will open a new page where you can set or change your e-mail address. You will need to provide your current password for security.
Change Password
Click on the "CHANGE PASSWORD" button. As usual, you will need to supply your current password in order to change your password.
Managing SSH Keys
Click on the "MANAGE SSH KEYS" button. On the page that follows you can view and delete existing SSH keys, and add new ones.
Resetting/Recovering Your Password
If you have forgotten or lost your password, you can request a password reset link by going go https://fileserver.stromasys.com in a browser and clicking on "LOST PASSWORD". This function requires that we have a valid e-mail address for you associated with the account..
Using SSH Keys Instead of a Password
SFTP allows authentication using a SSH private/public key-pair instead of a password. Essentially, you prove your identity by having the correct private key belonging to the public key that you give us, which you can do using the new web management interface. When an SSH public key is in place on the new file server, you must instruct your SFTP client to use the private key (associated with the public key you gave us) to authenticate.
Stromasys strongly requests that you protect your private key by doing the following:
- Use a strong (hard to guess) pass-phrase to encrypt the private key (otherwise, simple possession of the private key means SFTP access is possible).• Never give your private key to anyone. Your private key is for you, and you alone.
- Do not keep your private key on any computer system you do not consider utterly secure.
These measures will protect you and Stromasys.
Creating an SSH Key-Pair on Windows using PuTTY
To create a new SSH key pair on Windows, install "PuTTY" (if you don't already have it), then run "PuTTYgen". Then:
- at the bottom of the window, select "SSH-2 RSA" (under "Type of key to generate")
- enter "2048" for "Number of bits in a generated key"
- enter a strong passphrase in the "Key passphrase" field, and repeat it in the "Confirm passphrase" field
- enter a comment if you want one in the "Key comment" field
- click on the "Generate" button and move the mouse around in the big blank area at the top of the window until generation is complete
- click on "Save private key" and save the private key somewhere you will find it again
- click on "Save public key" and save it in the same folder
- in the field marked "Pubic key for pasting into OpenSSH authorized_keys file" select the entire contents and copy into your paste buffer
- start an editor (wordpad, notepad, etc) and paste the above contents into it, then save in the save folder as above as "openssh-key.pub", for example
- paste the contents of "openssh-key.pub" into the SSH key field on the Stromasys account management page and save it.
Creating an SSH Key-Pair on Linux
Use the command:
ssh-keygen -b 2048 -t rsa -f my-ssh-key |
Be sure to provide a pass-phrase, and save it somewhere safe.
When the command is finished, you should find the files my-ssh-key and my-ssh-key.pub. The first is the private key, the second is the public key.
You can also run the command without specifying a file with "-f <key-base-name>":
|
In which case the ssh-keygen command uses the default name and directory, which is ~/.ssh/id_rsa and ~/.ssh/id_rsa.pub.
SFTP Client Configuration Details
FileZilla Configuration
When you start FileZilla, you should see a window like the following:
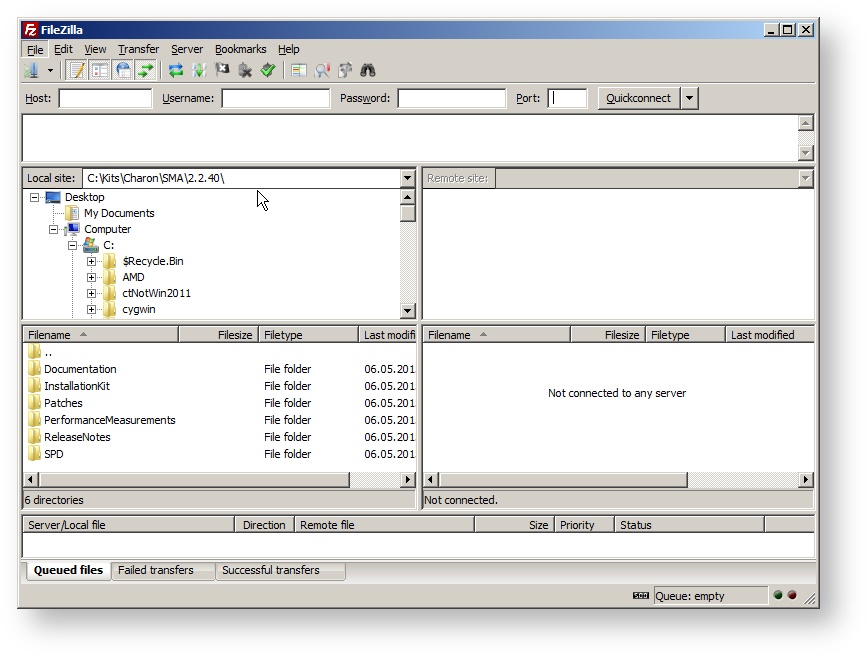
On the left is a folder browser and folder contents display for your local computer, but the right side is empty because you are not connected to any remote host (yet).
Click on the "File" menu button, then select "Site Manager..." which will open this window:
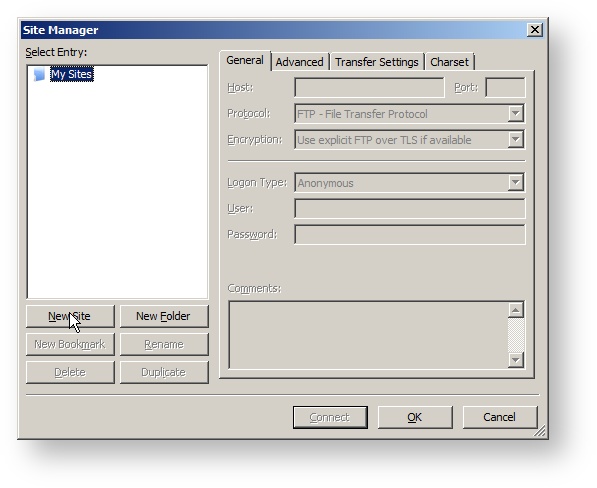
Click on "New Site", give the new site a name such as "my-username@fileserver", set the "Host": field to "fileserver.stromasys.com", "Port:" to "22", "Protocol" to "SFTP", then choose "Normal" for "Logon Type", and change the "User:" to your username, and enter the password:
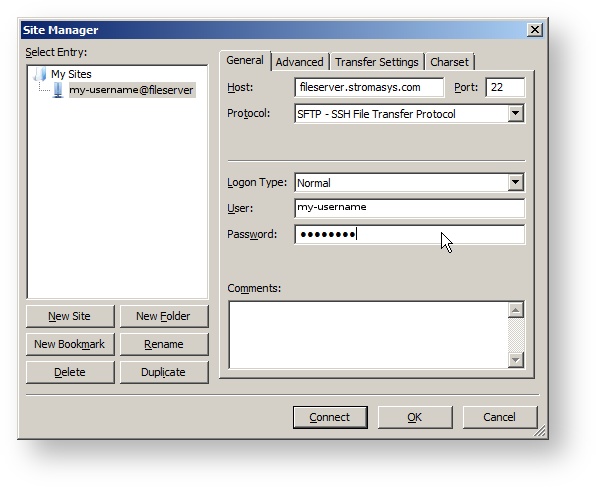
Now click on "Connect" to open a new connection. You will probably see the following warning:
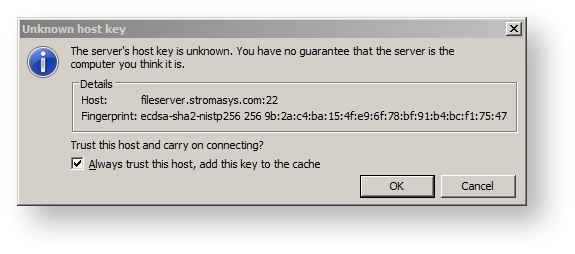
You should compare the "fingerprint", 9b:2a:c4:ba:15:4f:e9:6f:78:bf:91:b4:bc:f1:75:47, and if it matches, check the box "Always trust this host, add this key to the cache", and then click on OK. Now you should have a connection to the file server:

On the right you see your folders in the folder browser, and also in the file browser below. In the folder browser you can select the active folder, and then use drag-and-drop from the left to move files into the selected remote folder.
WinSCP Configuration
When you start WinSCP you will see the following screen:
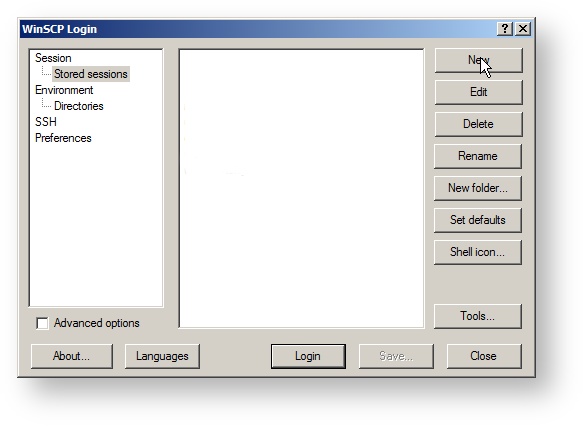
Click on the "New" button to create a new connection:
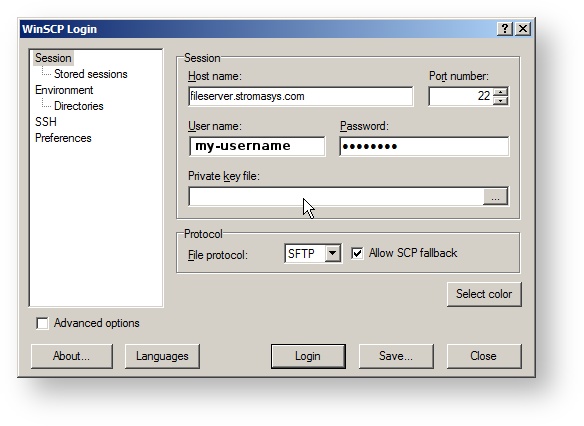
Enter the values above in the "Host name", "User name" and "Password" fields, and then click on "Save..." to create a shortcut for this connection (a "session").
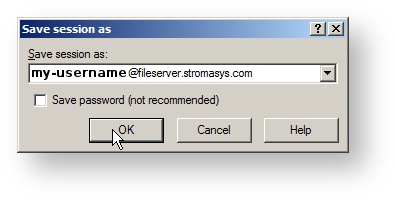
Saved sessions must be given names. You can accept the default or enter another name. Do not check the "Save password" box unless you can guarantee that the system on which you save the password is secure.
Next, you will be returned to the main screen where you should see your new saved session:
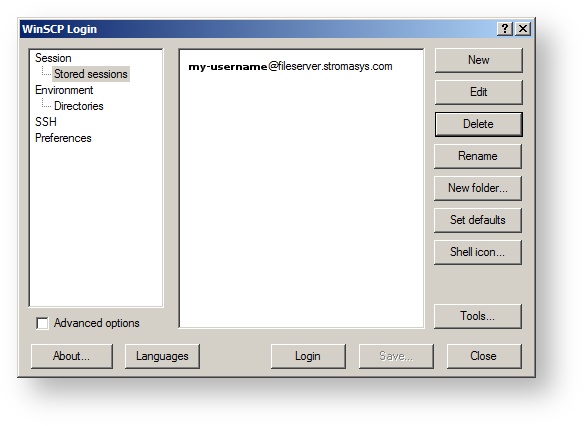
Double-click on the saved session name, or select the session name and click on "Login". The first time you connect, you will see the following warning:
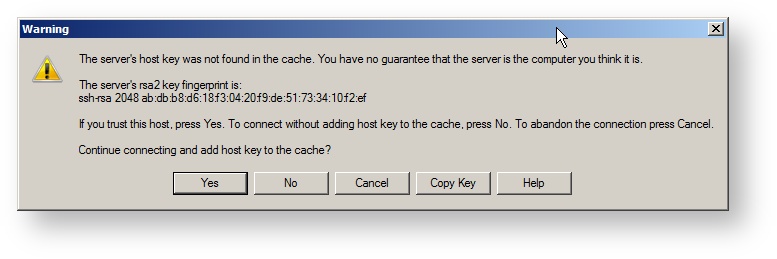
Make sure the fingerprint ("ab:db:b8:d6:18:f3:04:20:f9:de:51:73:34:10:f2:ef") matches, and if it does, click on "Yes".
Depending on whether you saved the password with tthe session (above), you will be prompted for the password or connected to the remote host:
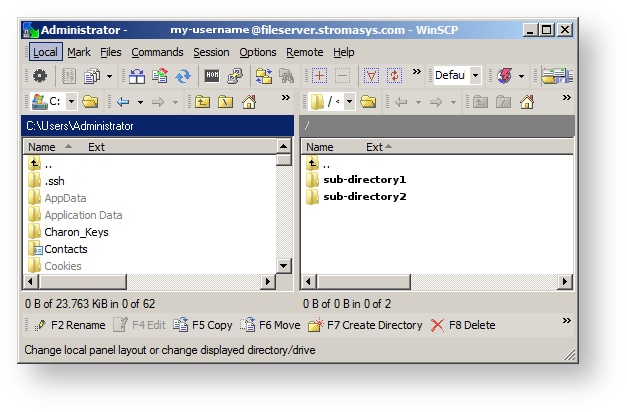
On the left is a view ("pane") of your local files, on the right is a view of the remote files. Double-click on a directory to enter it.
You can drag-and-drop files from one pane to the other to copy them.
© Stromasys, 1999-2024 - All the information is provided on the best effort basis, and might be changed anytime without notice. Information provided does not mean Stromasys commitment to any features described.