How to read a HASP key over RDP on Windows
Description
According to HASP, it is not possible to access the Sentinel key over RDP unless it is a NetTime key.
Even if the explanations given further are still valid, a utility is available for download to perform operations more easily.
Please see the page "Charon License Utility" and ask for us the download link if needed.
The instructions here provide a simple workaround to solve this problem. First, the background, Sentinel doesn't allow access over RDP unless you pay for a network key, in an effort to improve security. The service is able to read the key because it runs at an elevated privilege level and doesn't run when through RDP.
We can accomplish this using "Scheduled Tasks":
Step-by-step guide - GUI
To set this,
- either open the Administrative tools under Control Panel and select "Task Scheduler" or
- execute
taskschd.mscfrom the Windows run command (press Windows key + R)
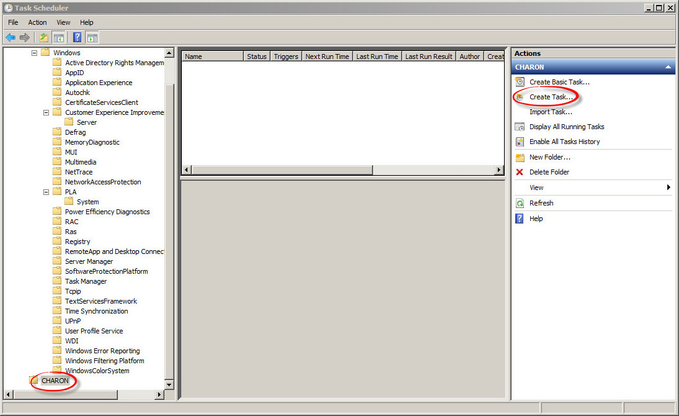
Right click on Task Scheduler Library and select New folder then enter CHARON.
On the right pane, select "Create Task...". ![]() Do not use "Create Basic Task..." some of the options required aren't available in that wizard.
Do not use "Create Basic Task..." some of the options required aren't available in that wizard.
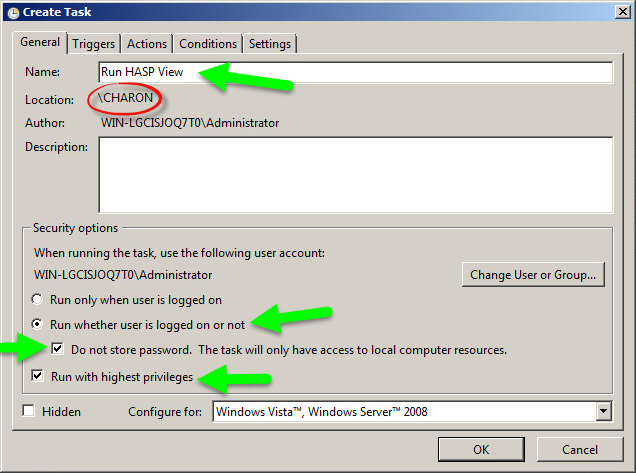
On the General tab, you need to setup the options as shown below:
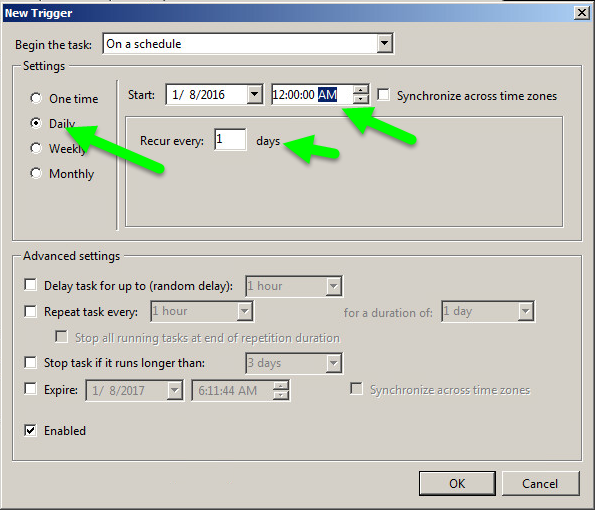
On the Triggers tab, you need to define a new trigger for the task. You can set this up to run as often as you like.
![]() The output file will be over written after each run.
The output file will be over written after each run.
Example - execution once a day at midnight:
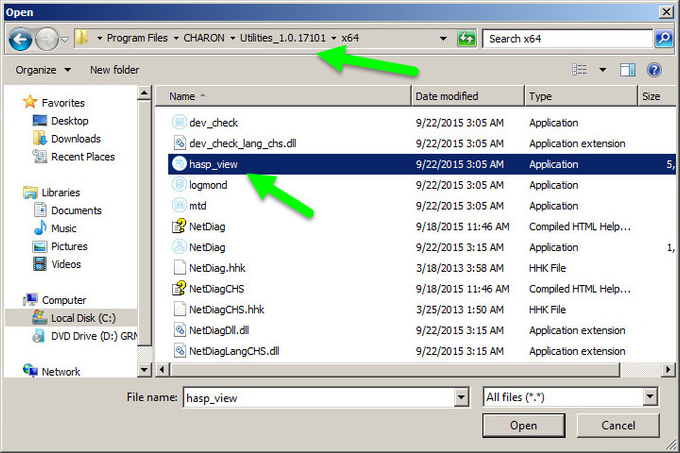
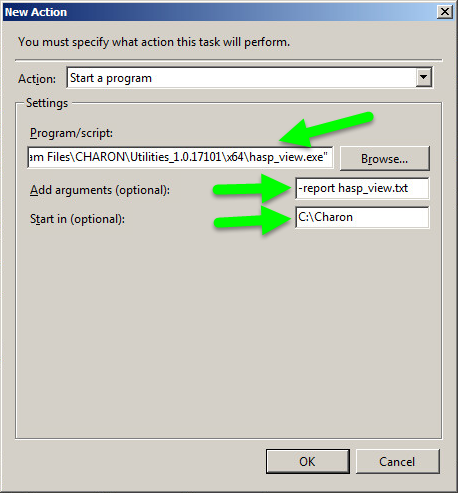
Finally, you need to define the action to be run which corresponds to the hasp_view.exe utility.
Example for CHARON-AXP/VAX V4.7 Build 17101:
For CHARON-AXP/VAX versions 4.8 and higher, the hasp_view.exe file is located in the CHARON installation folder under the "Build_xxxxx\x64" child folder. Example: C:\Program Files\CHARON\Build_18100\x64
You need to specify "-report <file>.txt" as an argument and the directory to run the application from in the final input box, the "hasp_view.txt" file will be placed in this directory.
You can now execute this task manually to check it is correctly set.
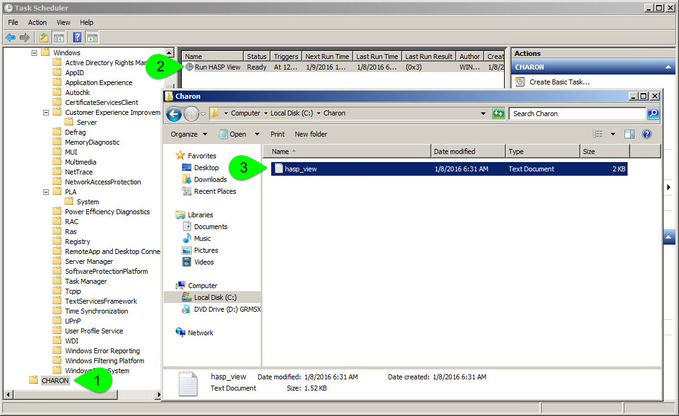
Select the CHARON folder (1) then right click on the "Run HASP View" task and click "Run" (2). Verify the file is correctly created (3) and open it to check its content.
Step-by-step guide - CUI
The Scheduled Task may also be created and executed from the (Admin) command line:
First, create the task using the following command (the path to hasp_view.exe depends on your version of Charon):
Example with CHARON-AXP V4.7:
...> schtasks.exe /Create /RU SYSTEM /SC ONCE /ST 00:05 /TN "CHARON\HASP_VIEW" /TR "'C:\Program Files\CHARON\Utilities_1.0.17101\x64\hasp_view.exe' -report D:\haspview.txt" |
Example with CHARON-AXP V4.8:
...> schtasks.exe /Create /RU SYSTEM /SC ONCE /ST 00:05 /TN |
![]() Ignore the WARNING: Task may not run because /ST is earlier than current time.
Ignore the WARNING: Task may not run because /ST is earlier than current time.
Then, run the task as needed with:
...> schtasks.exe /Run /I /TN |
Related articles
© Stromasys, 1999-2024 - All the information is provided on the best effort basis, and might be changed anytime without notice. Information provided does not mean Stromasys commitment to any features described.