


Migration to CHARON-AXP for Windows
- Copy Page Tree
- Bruno Miretti (Deactivated)
- Kirill Nikolaev (Unlicensed)
Table of Contents
Introduction
This section describes how to migrate your HP Alpha system to CHARON-AXP. We will use a sample HP AlphaServer ES40 system running OpenVMS to demonstrate the migration procedure. The process is similar for all CHARON-AXP models.
Creating CHARON Virtual Machine
As a first step it is required to create a CHARON Virtual Machine (VM) using the CHARON Virtual Machines Manager in the following way:
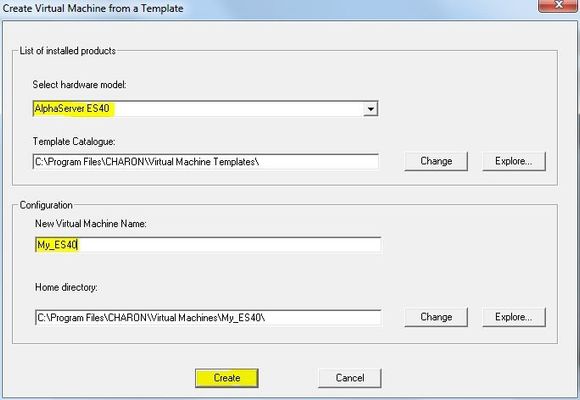
Press the "Create VM from Template" button:

Specify the HP Alpha model to be emulated and the name of the VM then press the "Create" button:
The VM will be created:
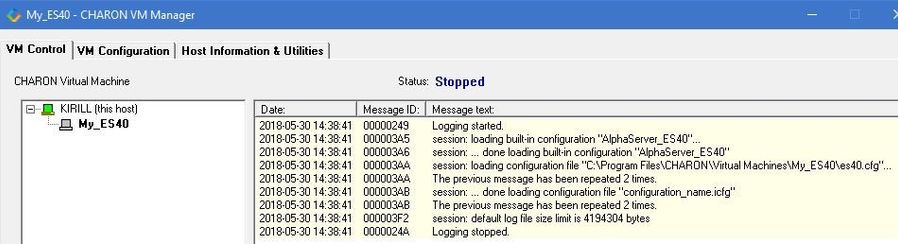
Select the VM from the left pane and switch to the "VM Configuration" tab.
In order to reproduce the target HP Alpha configuration, press the "Edit Configuration file" button:
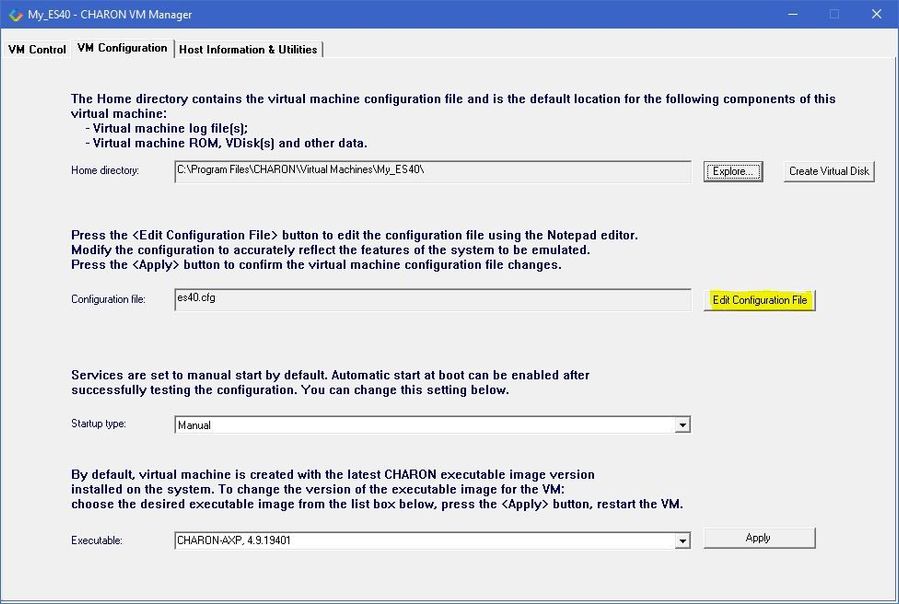
![]() Alternatively it is possible to select the target CHARON VM and press the "Edit Configuration" button.
Alternatively it is possible to select the target CHARON VM and press the "Edit Configuration" button.
Collecting information about the source HP Alpha system
The next step is to determine the exact configuration of the HP Alpha hardware in order to create the CHARON VM configuration file.
Turn on the source HP Alpha system. At the ">>>" prompt, issue the "show device" command:
>>> |
To get more detailed information, boot OpenVMS and issue the "show device /full" command:
Disk PFCAXP$DKA0:, device type RZ28, is online, mounted, file-oriented device, Disk PFCAXP$DKA100:, device type RZ22, is online, file-oriented device, Disk PFCAXP$DKA200:, device type RZ23, is online, file-oriented device, Disk PFCAXP$DQA0:, device type TSSTcorpCDDVDW SH-222BB, is online, file-oriented Disk $1$DGA0: (PFCAXP), device type RZ24, is online, file-oriented device, Magtape PFCAXP$MKA600:, device type Virtual SCSI Tape, is online, file-oriented Terminal OPA0:, device type VT102, is online, record-oriented device, carriage Device EWA0:, device type DE500, is online, network device, device is a template Device FGA0:, device type KGPSA Fibre Channel, is online, shareable, error Device PGA0:, device type SCSI FCP, is online, error logging is enabled. ... Device PKA0:, device type Qlogic ISP1020 SCSI port, is online, error logging is Device $1$GGA32767:, device type Generic SCSI device, is online, shareable. $ |
If Tru64 UNIX V5 is running on the host system, it is recommended to use the following commands to get information on the host configuration:
| Command | Description |
|---|---|
#/sbin/hwmgr view devices | Get detailed information about the host hardware configuration |
#/sbin/hwmgr show scsi | Get specific information about the host SCSI controllers and attached disks |
#/sbin/hwmgr view hierarchy | Get information about the host controllers |
Please refer to the Tru64 UNIX User's Guide for more details.
The source HP Alpha peripheral configuration in this example is:
| Controller | Devices on controller | Description |
|---|---|---|
| KZPBA | -DKA0 (RZ28) | SCSI disk/tape controller |
| KGPSA-CA | -DGA0 (RZ24) | FC disk controller |
| OPA0 | System console | |
| -DQA0 | IDE CD-ROM controller | |
| EWA0 | Network interface, MAC address: "F8-D1-11-00-67-E6" |
Now collect some general information about the HP AlphaServer ES40 system:
>>> |
>>> |
So the collected information about the HP AlphaServer ES40 system is:
| Component | Value |
|---|---|
| System Type | AlphaServer ES40 6/667 |
| Serial Number | SN01234567 |
| Number of CPUs | 4 |
| System memory | 512 Mb |
In some particular situations it is also important to know the exact placement of all the peripheral devices on the HP Alpha PCI bus. To do so, issue the "show config" command at the SRM prompt (>>>) on the HP Alpha console. For example:
>>> |
The "show config" command collects the following information of placement of peripheral devices on the PCI bus:
- Bus number
- Slot number
- Function number
To find out the exact types of controllers and other useful information refer to the source HP Alpha system documentation.
Creation of the CHARON-AXP configuration file
Using the above information, the following parameters and values can be set in the configuration file:
|
Making disk images
In our example, the mapping of the KZPBA SCSI controller include disk and tape images. The tape images have not to be manually created whereas the disk images have to be created as described below.
Our example creates disk images of the original physical type. In reality, this step is the best opportunity in the migration to provision larger disks to get extra storage space.
Create special directories for storing the disk and tape images. The created directories are referenced in the sample configuration file above.
...> cd C:\ |
This operation can also be done using Windows Explorer.
![]() Alternatively it is possible to put the tape and disk images in the CHARON VM Home Directory.
Alternatively it is possible to put the tape and disk images in the CHARON VM Home Directory.
Start the "MkDisk" utility by pressing the "Virtual Disk Tool" button in the "Host Information & Utilities" tab of the CHARON Virtual Machines Manager:
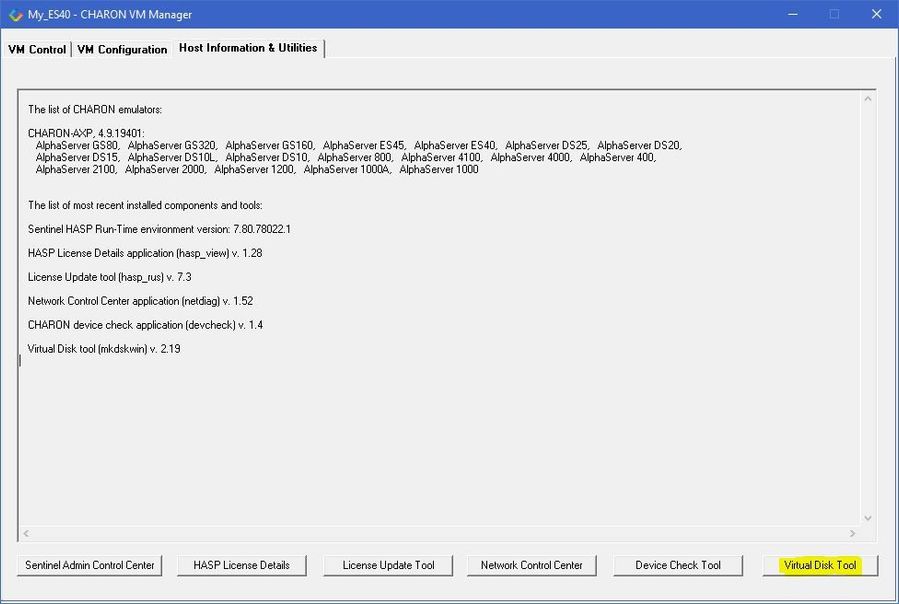
The following dialog will appear:
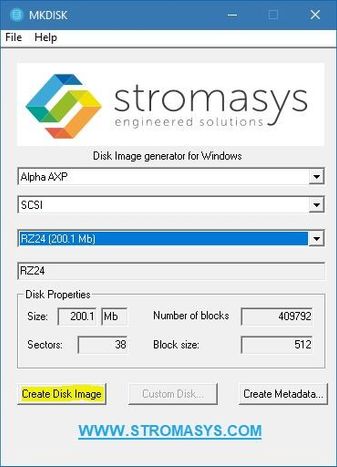
Select "Alpha AXP" in the "Select System" drop-down menu, "SCSI" in the "All Controllers" drop-down menu and "RZ24" (for example) in the "Select Disk Type" drop-down menu.
Press then the "Create Disk Image" button:
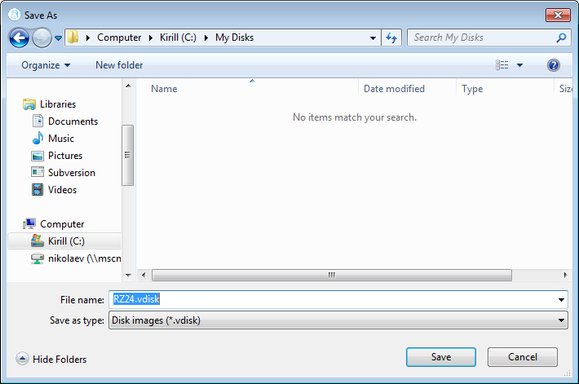
The utility will ask you to specify the output file name. Select the "C:\My disks" directory that has been created earlier, or create it directly in the dialog, and press the "Save" button:
The "MkDisk" utility will create the requested disk image:
Repeat this sequence for the disks "RZ28.vdisk", "RZ22.vdisk" and "RZ23.vdisk". Place them in the same folder.
Installation of HP Alpha operating system
The next step is to transfer the data from the source HP Alpha system to CHARON-AXP. The easiest way to do this is via backup over the network but for this operation a bootable network-enabled operating system on a CHARON-AXP disk image or physical disk is needed.
The example configures the CHARON-AXP AlphaServer ES40 system for installation of HP OpenVMS from a distribution CD-ROM (usually it is "\\.\CdRom0" if the host has only one CD-ROM drive):
|
![]() DKA300 will be the disk where all the source disks will be copied so its size needs to be large enough to store all the disk backup images.
DKA300 will be the disk where all the source disks will be copied so its size needs to be large enough to store all the disk backup images.
Create an empty disk image for installation of HP OpenVMS and another one for storing the backups from the source HP Alpha system as it is shown in the section above.
Run the CHARON VM and boot from the CDROM named "dqa0" ("migration.cfg" is the configuration file we use in this example):
|
Install HP Alpha/VMS including DECnet on "dka400". The DECnet address must belong to the same area as the source HP Alpha system.
Login to the newly installed OpenVMS system and initialize the disk that will be used to store the backups. Let's assume its prompt is "newvms$ "
|
Making remote backups
Now we are ready to create the disk backups of the source HP Alpha system on the CHARON VM.
Boot the CHARON VM and make sure that the source HP Alpha system is available via DECnet.
Login to the source HP Alpha system. Stop all the batch queues, kick off the users, stop all the applications and close the databases if there are. The commands listed in SYS$MANAGER:SYSHUTDWN.COM may be helpful. The goal is to close as many files as possible. The system disk will have several files opened (pagefile, swapfile, etc.) and this is a normal situation.
![]() The use of the "SHOW DEVICE /FILES" command would be of help to list opened files on a disk.
The use of the "SHOW DEVICE /FILES" command would be of help to list opened files on a disk.
In this example, the CHARON VM system is node 1.400.
Issue the following commands from the source HP Alpha. Let's assume its prompt is "source$ ":
|
When the backup operation will be completed, the disk "DKA300" of the CHARON VM will contain 3 savesets: "DKA0.BCK", "DKA100.BCK" and "DKA200.BCK".
Restore backups to CHARON-AXP disks
The savesets have now to be restored on their corresponding virtual disks. Login to the CHARON VM guest OS and issue this sequence of commands:
|
If you are going to have the CHARON VM and the original physical HP Alpha on the network at the same time, you must change the network identity of one system, usually the CHARON VM.
The easiest way is to boot the CHARON VM on the restored system disk with the network disabled and to configure new addresses then enable the network and reboot.
![]() The NIC can be disabled with a
The NIC can be disabled with a interface="(disabled)" statement in the CHARON VM configuration file.
Alternative ways of data transfer
Some alternative methods of data transfer are also possible. For example:
- Connect a SCSI tape drive to the CHARON-AXP host via a PCI card
- Map the tape drive in the CHARON VM configuration file
a. Restore the source HP Alpha system backups from tape to disk images via OpenVMS running on the CHARON VM.
b. Boot from standalone backups and restore the content to the CHARON VM virtual disks - Dump the source HP Alpha system backups to tape images using the "mtd" utility and:
a. Boot from the freshly installed OpenVMS system and restore the tape images to the CHARON VM virtual disks
b. Boot from the standalone backup and restore the content to the CHARON VM virtual disks
- Map the tape drive in the CHARON VM configuration file
Create a network cluster between the source HP Alpha system and the CHARON VM (it is possible to use the source system as a boot server); then perform simple backups from one disk to another:
$ BACKUP/IMAGE/IGNORE=INTERLOCK REAL$DKA0: DKA0:
Related content
© Stromasys, 1999-2024 - All the information is provided on the best effort basis, and might be changed anytime without notice. Information provided does not mean Stromasys commitment to any features described.