


Setting up a Charon-SSP AWS Cloud Instance
- W.Erber
This chapter describes how to set up a basic Charon-SSP instance in AWS.
Contents
Prerequisites
General Prerequisites
To access and use Charon-SSP AWS, you need an Amazon AWS account.
Please note the following details about the different AWS environments:
With EC2-Classic, your instances run in a single, flat network that you share with other customers. With Amazon VPC, your instances run in a virtual private cloud (VPC) that is logically isolated from other AWS accounts. The EC2-Classic platform was introduced in the original release of Amazon EC2. If you created your AWS account after 4 December 2013, it does not support EC2-Classic, so you must launch your Amazon EC2 instances in a VPC. If your account does not support EC2-Classic, Amazon AWS will create a default VPC. By default, when you launch an instance, it is launched in your default VPC. Alternatively, you can create a non-default VPC and specify it when you launch an instance.
For more information about the specifics of each environment, please refer to the documentation on the Amazon web page: https://docs.aws.amazon.com/AWSEC2/latest/UserGuide/ec2-classic-platform.html.
Licensing
Charon-SSP AWS requires a license to run emulated SPARC systems. This license is created automatically upon first launch of the Charon-SSP AWS instance. Please note the following points:
- The Charon-SSP AWS instance requires Internet access (via public IP address or NAT) for the license mechanism to work.
- If you change the instance type after first launching the instance and thereby change important hardware characteristics (e.g., number of CPU cores, memory size), the license will be invalidated.
- If you need to change important hardware characteristics (e.g., number of CPU cores, memory size), you need to create a new instance. Therefore it is strongly recommended to store all relevant data on a separate EBS volume that can easily be detached from the old instance and attached to a new instance.
- Should access to the license be lost, there is a grace period of 24 hours. If license access is not restored within this period, the emulator will stop (if a guest system is running at the time, this is the equivalent of disconnecting the power without clean shutdown, i.e., it may lead to loss of data).
![]() You will be billed by Amazon for your use of the Charon-SSP AWS instance. Stromasys will not bill you directly.
You will be billed by Amazon for your use of the Charon-SSP AWS instance. Stromasys will not bill you directly.
![]() The user is responsible for any Solaris licensing obligations and has to provide the appropriate licenses.
The user is responsible for any Solaris licensing obligations and has to provide the appropriate licenses.
AWS Instance Type Prerequisites (Hardware Prerequisites)
By selecting an instance type in AWS, you select the virtual hardware that will be used for Charon-SSP AWS. Therefore, the selection of an instance type determines the hardware characteristics of the Charon-SSP virtual host hardware (e.g., how many CPU cores and how much memory your virtual Charon host system will have).
Important information:
Please make sure to dimension your instance correctly from the beginning (check the minimum requirements below). The Charon-SSP license is created when the instance is first launched. Changing later to another instance type with a different number of CPU cores, different memory size, or other significant differences in hardware characteristics will invalidate the license and thus prevent Charon instances from starting.
Minimum requirements for Charon-SSP:
- Minimum number of host system CPU cores:
- At least one CPU core for the host operating system.
- For each emulated SPARC system:
- One CPU core for each emulated CPU of the instance.
- At least one additional CPU core for I/O. If server JIT optimization is used, add an additional I/O CPU for improved translation speed.
- Minimum memory requirements:
- At least 2GB of RAM for the host operating system.
- For each emulated SPARC system:
- The configured memory of the instance.
- 2GB of RAM (6GB of RAM if server JIT is used) to allow for DIT optimization, emulator requirements, run-time buffers, SMP and graphics emulation.
- One or more network interfaces, depending on customer requirements. The network performance level of an instance type provides an indication of the data transfer rates to be expected from the AWS instance.
- Charon-SSP/4U+ and Charon-SSP/4V+ must run on hardware supporting VT-x. For this, you need to select an instance with the suffix metal in the name. If you consider running Charon-SSP/4U+ or 4V+ in AWS to achieve better performance, please contact Stromasys or a Stromasys VAR for additional information.
![]() Please note that the sizing guidelines above—in particular regarding number of host CPU cores and host memory—show the minimum requirements. Every use case has to be reviewed and the actual host sizing has to be adapted as necessary. For example, the number of I/O CPUs may have to be increased if the guest applications produce a high I/O load. Also take into consideration that a system with many emulated CPUs in general is also able to create a higher I/O load and thus the number of I/O CPUs may have to be raised.
Please note that the sizing guidelines above—in particular regarding number of host CPU cores and host memory—show the minimum requirements. Every use case has to be reviewed and the actual host sizing has to be adapted as necessary. For example, the number of I/O CPUs may have to be increased if the guest applications produce a high I/O load. Also take into consideration that a system with many emulated CPUs in general is also able to create a higher I/O load and thus the number of I/O CPUs may have to be raised.
AWS Login and New Instance Launch
Amazon EC2 provides a wide selection of instance types optimized to fit different use cases. Instances are virtual servers that can run applications such as Charon-SSP.
To start the creation of a new cloud instance using the Charon-SSP AMI, perform the following steps:
1. Log in to your AWS management console.
2. Find and select the EC2 service. You can use the search window or find it in the recently used services.
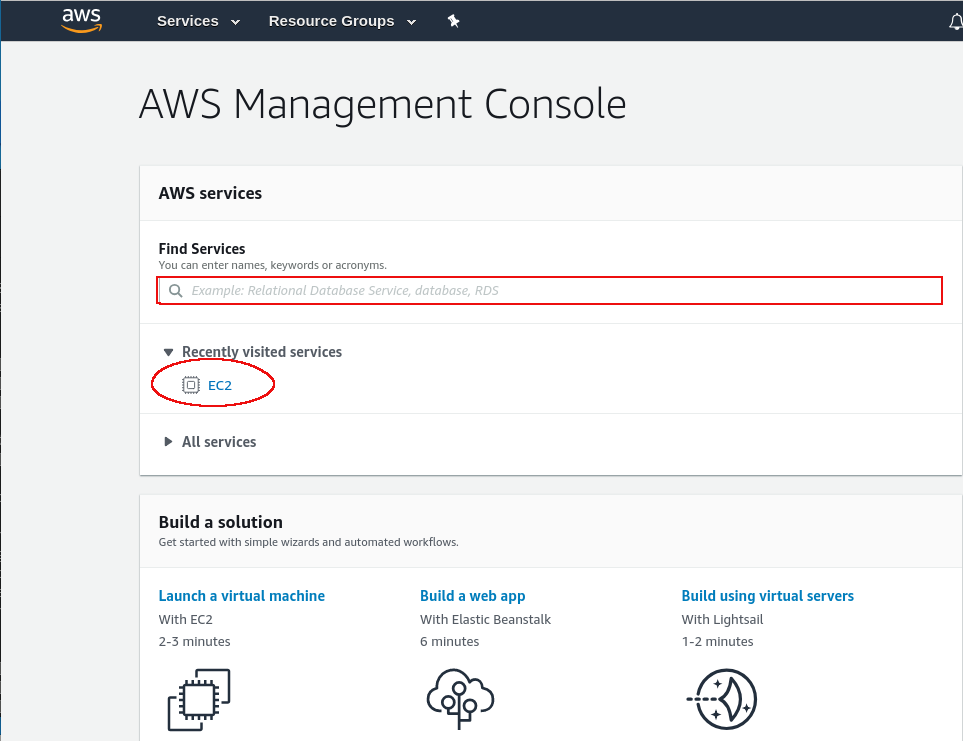
This will open the E2C dashboard.
3. On the EC2 dashboard click on the Launch Instance button.
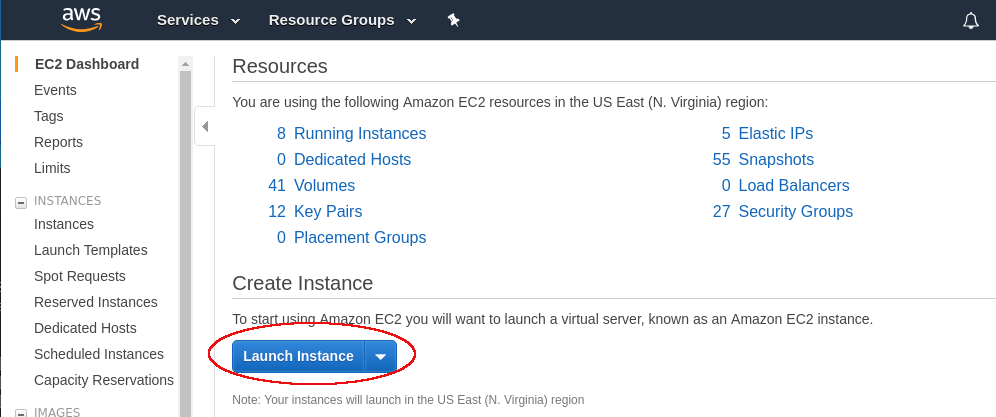
This will initiate the instance creation process consisting of seven steps:
- Choose AMI
- Choose Instance Type
- Configure Instance
- Add Storage
- Add Tags
- Configure Security Groups
- Review, launch and select/create key-pair for access.
These steps are described in the next section.
New Instance Configuration
The instance creation and configuration process will guide you through a number of configuration steps and allow you to start the new instance when done.
1. Choose AMI:
Search for Charon products and select the desired Charon products from Marketplace or (depending on your environment) from My AMIs.
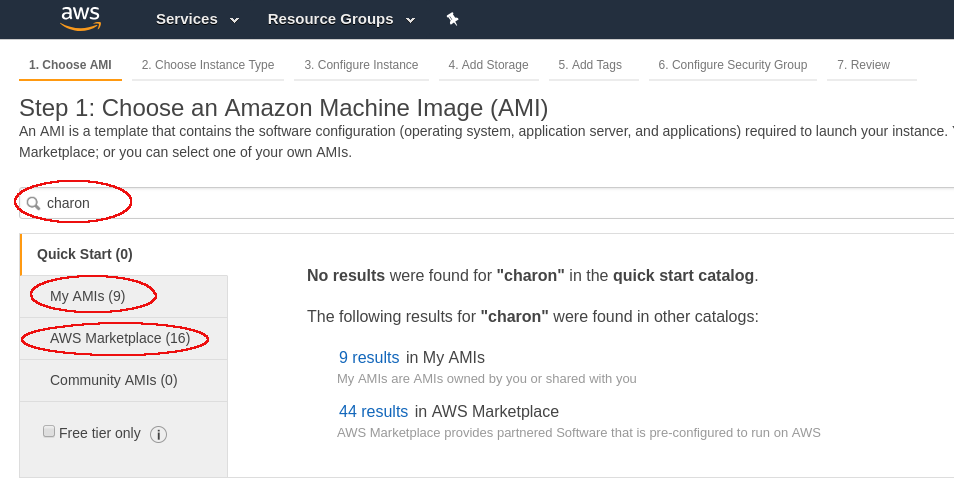
Clicking on one of the categories above will display a list of images. Select the appropriate Charon-SSP AMI.
This will take you to the next step, the instance type selection.
2. Choose Instance Type:
Amazon EC2 offers instance types with varying combinations of CPU, memory, storage, and networking capacity.
Select an instance type that matches the requirements of the Charon-SSP product.
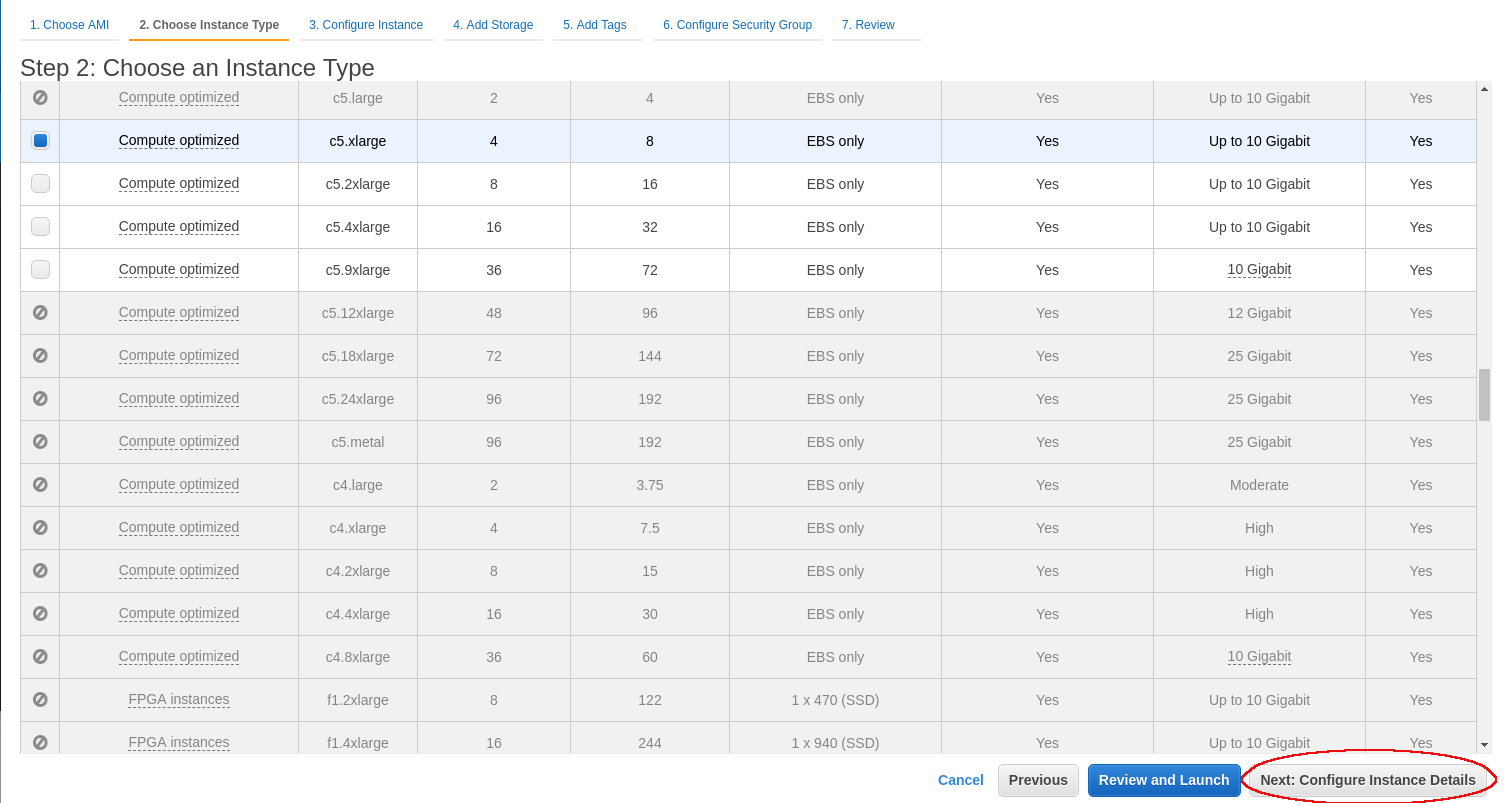
When done, continue by clicking on the Next: Configure Instance button.
3. Configure Instance:
In this section, you can set up the details of your instance configuration.
For example, you can select the VPC subnet your instance should be in and whether an interface should automatically be assigned a public IP address. ![]() Automatic assignment of a public IP address only works if there is only one network interface attached to the instance.
Automatic assignment of a public IP address only works if there is only one network interface attached to the instance.
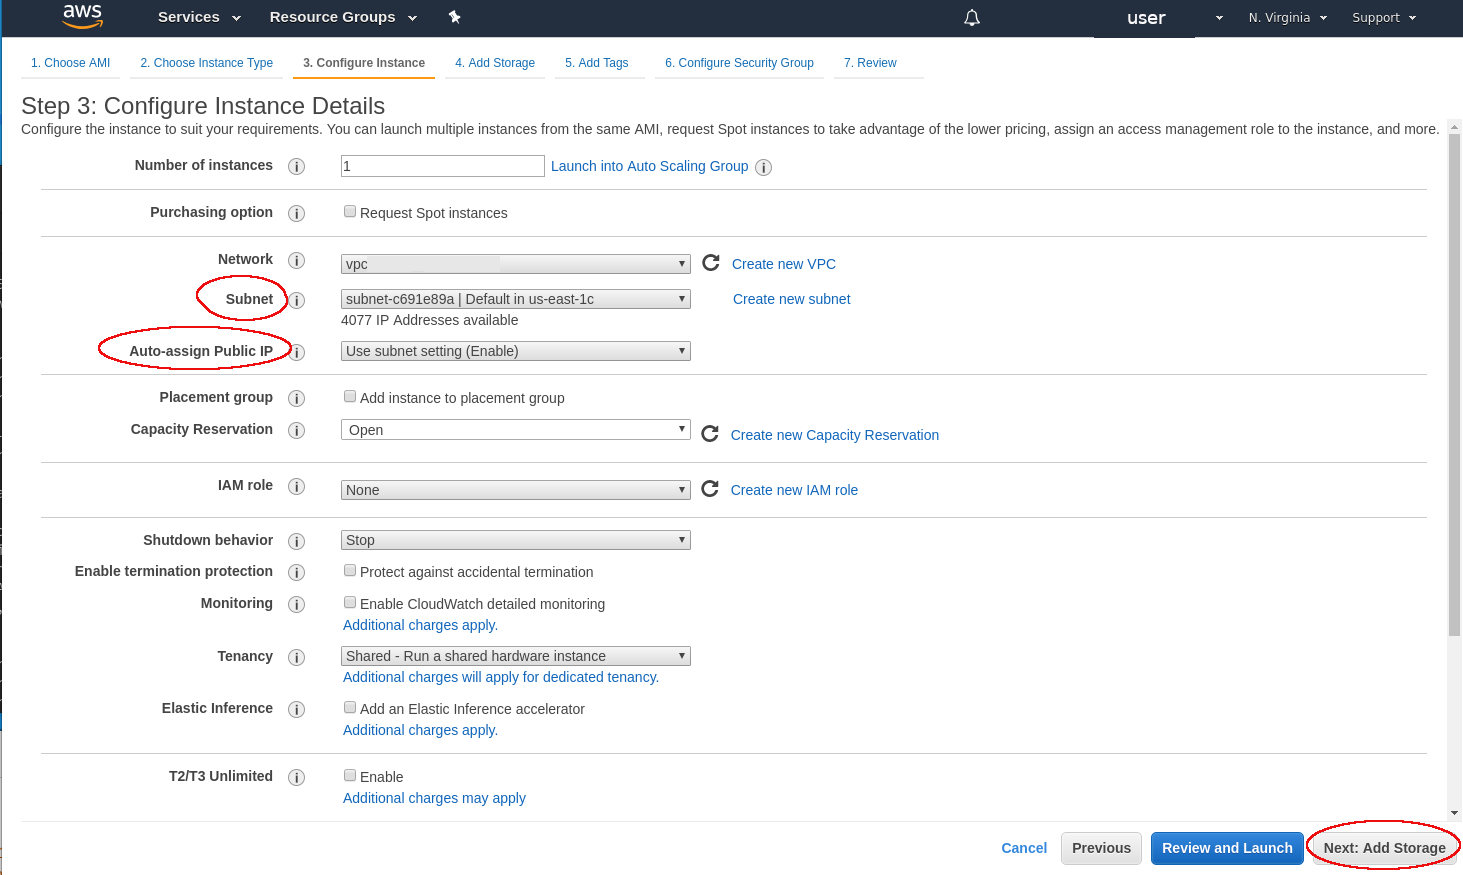
Once you have selected all desired configuration options, click on Next: Add storage to continue.
4. Add Storage:
The size of the root volume must be at least 20GB for the Charon-SSP host system to start. You can add more storage later to provide space for virtual disk containers and other storage requirements.
![]() It is recommended to create separate storage space (using AWS EBS volumes) for Charon application data (e.g., disk images). If required, such volumes can later easily be migrated to another instance (see Storage Management).
It is recommended to create separate storage space (using AWS EBS volumes) for Charon application data (e.g., disk images). If required, such volumes can later easily be migrated to another instance (see Storage Management).
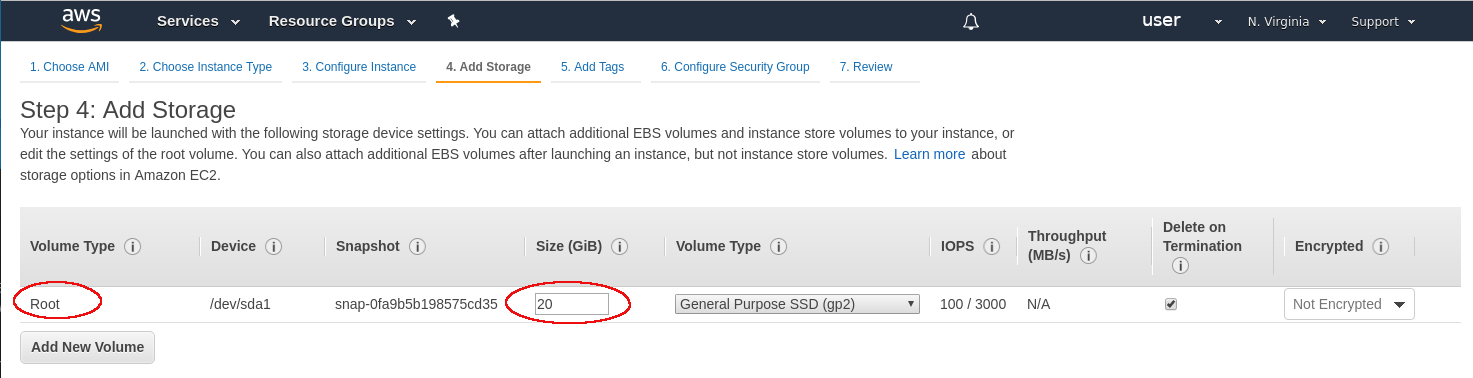
Once you are done, again click on the Next: Add tags button.
5. Add Tags:
Tags allow you to add information to your instance, for example, an easily remembered name as shown in the example below:
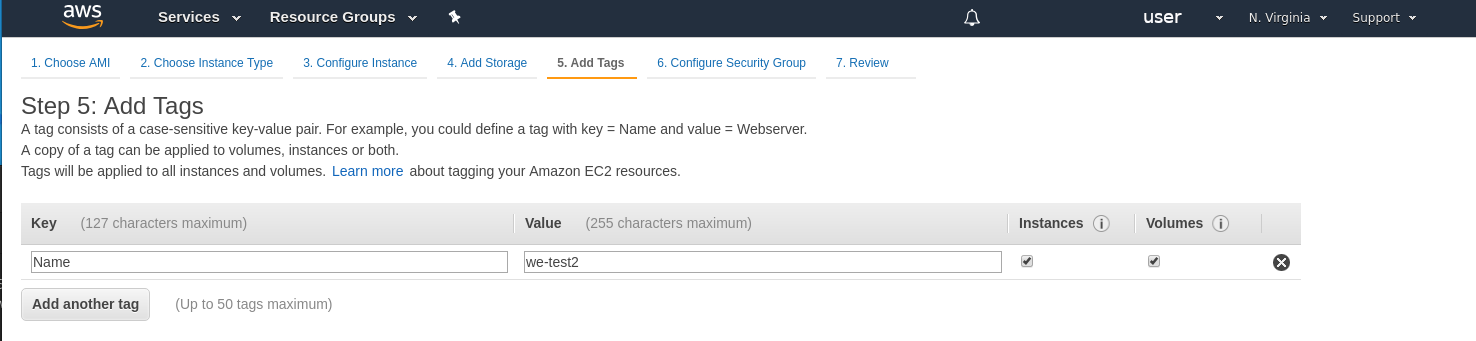
After adding tags as required, continue to the next step (Configure Security Groups).
6. Configure Security Groups:
A security group is similar to a firewall. It defines which traffic is allowed to flow to and from the instance. For Charon-SSP you must at least enable SSH access to the system. This will allow you to access the management interface and to run Charon-SSP services via an SSH VPN tunnel. You can select an existing group or create a new one. If you create a new one, you can enter an name and an appropriate description. An example of a security group is shown below.
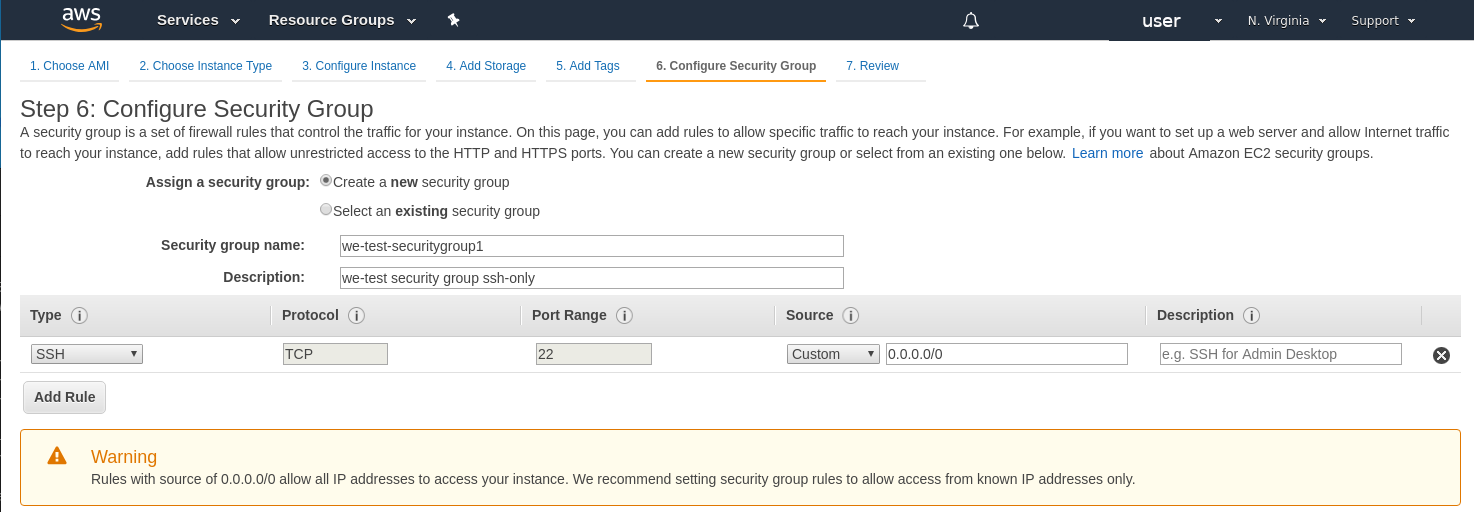
The warning shown alerts the user to the fact that the source IP addresses are not restricted, i.e., any system is allowed to use SSH to access the instance. Restrict the source address range if possible. See also Firewall and AWS Security Group Considerations.
Once you have set up your security group, continue to the next step (Review and Launch).
7. Review:
Here you can review the configuration of your instance and edit the individual sections if required. The image below shows a sample:

If you are satisfied with the settings, click on the Launch button to start your instance for the first time.
8. Launch and select/create key-pair for access:
When starting the instance for the first time, you will be shown a window asking you to create a new key-pair or to use an existing one. When creating a new key-pair, you must download the private key to your local system and store it in a safe place. It is required to access your instance. The public key is stored in the newly created Charon-SSP host system, in the authorized_keys file of the sshuser and the charon user. The sample below shows the window when the creation of a new key-pair was selected:
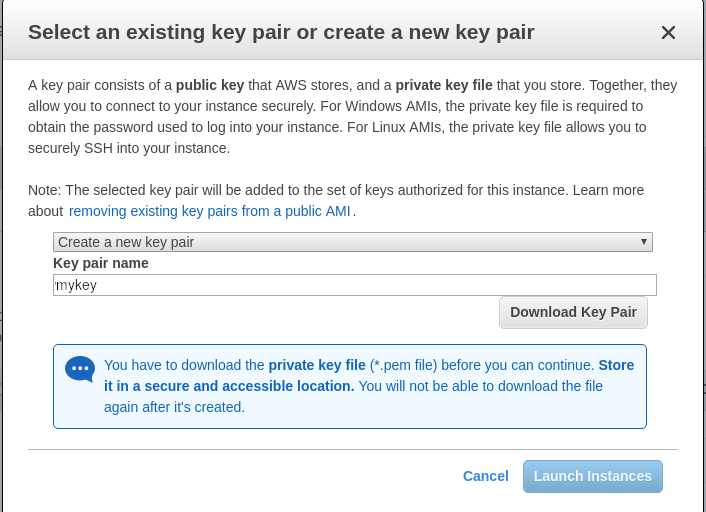
You cannot start the instance without downloading the key. If you select to re-use an existing key-pair, you have to confirm that you are in possession of the private key before you can launch the instance.
Verify that instance is running:
After starting your instance for the first time, you will see it in the initializing state in the list of your AWS instances. It will take a bit of time to get to the running state. After this, important information, for example, the public IP address and public DNS name (marked in red) of the instance will also be displayed. The following image shows an example:

The following sections will show you how to access the instance and how to perform additional storage and network configurations.
![]() If you select your instance, the bottom of the screen will show a detailed description and status information of your instance.
If you select your instance, the bottom of the screen will show a detailed description and status information of your instance.
Related content
© Stromasys, 1999-2024 - All the information is provided on the best effort basis, and might be changed anytime without notice. Information provided does not mean Stromasys commitment to any features described.