VLAN usage in CHARON
Table of contents
Description
CHARON is compatible with VLAN interfaces that are widely used in modern network environments.
In this article we describe Broadcom and Intel approaches to VLAN configuration and how the VLAN adapters can be used in CHARON.
Please note the described configurations are given only as an example since the vendors may change details in new versions of the network drivers. In case of inconsistencies, please refer to the vendor's original documentation.
Step-by-step guide for Broadcom Network Adapters
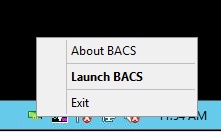
Start up the "Broadcom Advanced Control Suite" utility by right-clicking its icon in the system tray:
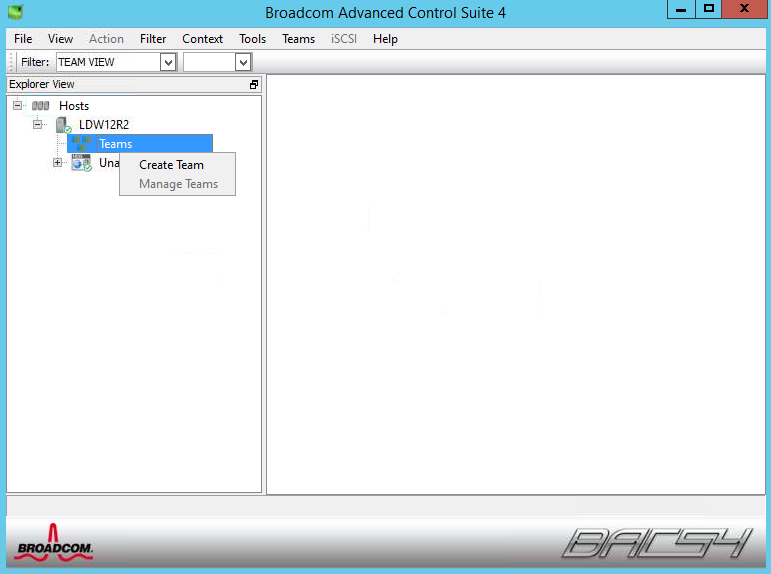
In the utility main window, select "Teams", then right click and select "Create Team":
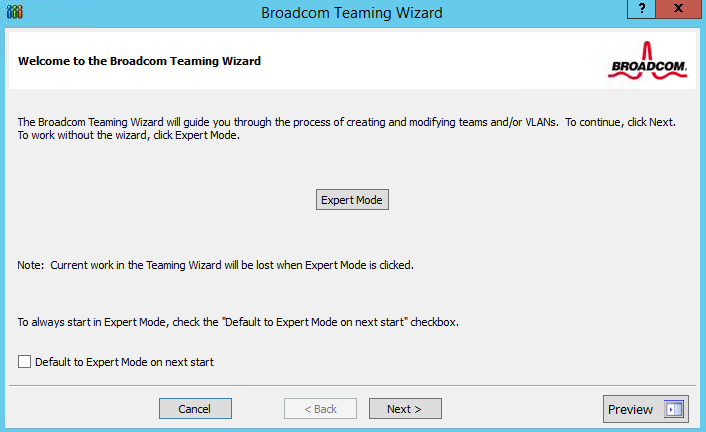
Press the "Expert Mode" button:
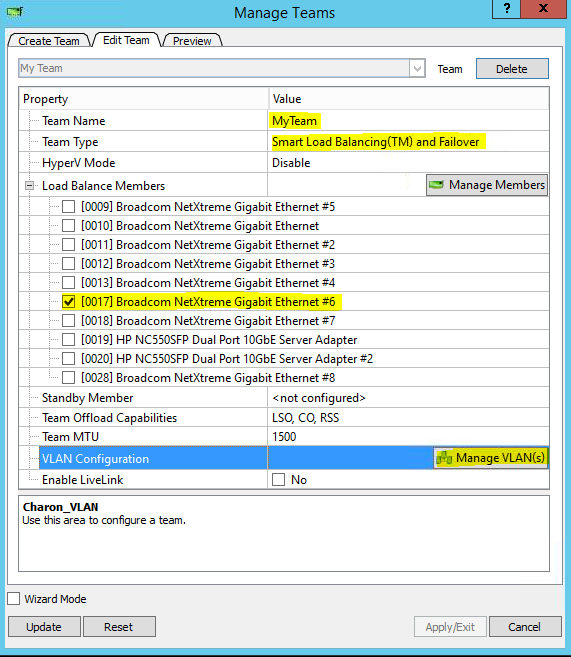
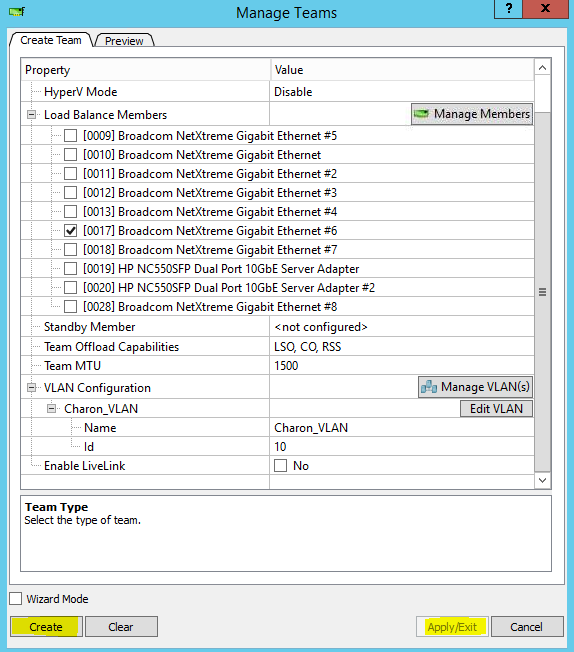
Specify the name of the team to be created (for example "MyTeam") without spaces and the team type (it is recommended to use "Smart Load Balancing (TM) and Failover" mode). Then select the physical interface to be used for the team ("Broadcom NetXtreme Gigabit Ethernet #6" in our example) and click "Manage VLAN(s}":
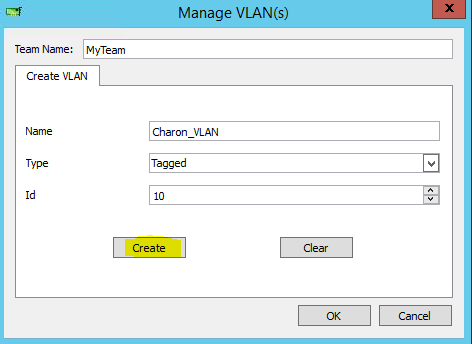
Create the VLAN interface to be used for CHARON. In our example its name is "Charon_VLAN", the type is "Tagged" and its ID is 10. Press "Create" and then "Ok":
Finish creation of the VLAN for CHARON by pressing "Create" and then "Apply/Exit":
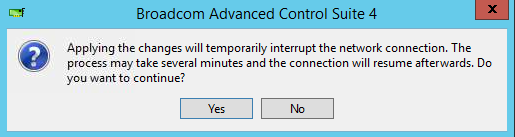
A warning message may appear. Press "Yes" to continue:
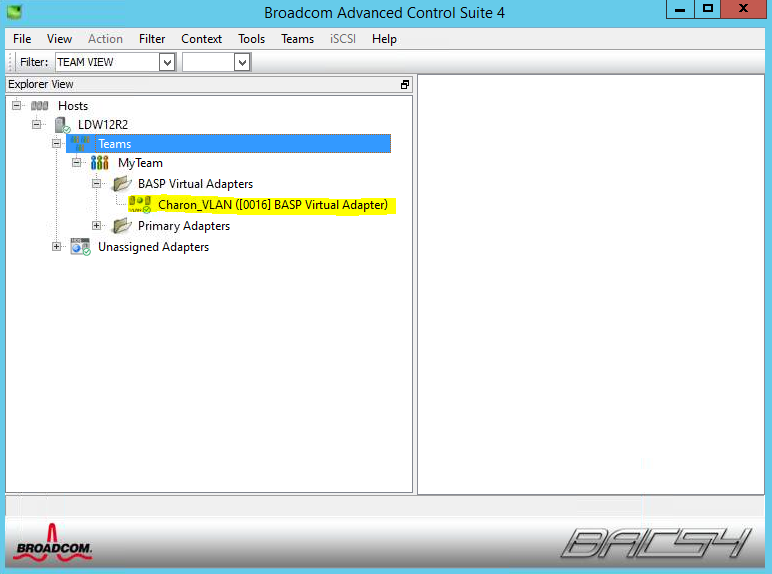
Review the created VLAN interface to be used for CHARON:
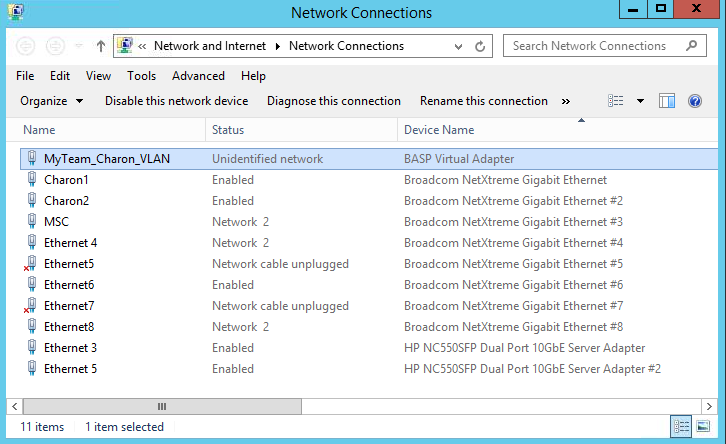
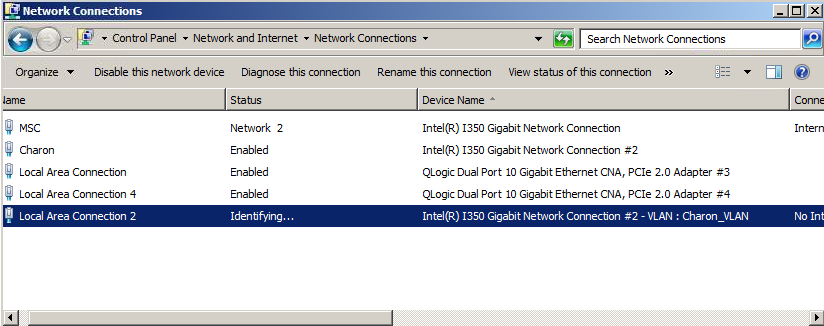
Exit the "Broadcom Advanced Control Suite" utility and review the VLAN interface in the "Network Connections" applet:
Now it is possible to use "MyTeam_Charon_VLAN" interface in CHARON configuration in the following way (after installation of NDIS driver and dedication of this interface to CHARON with the "Network Control Center" utility):
load packet_port/chnetwrk EWA0 interface="connection:MyTeam_Charon_VLAN" |
Step-by-step guide for Intel Network Adapters
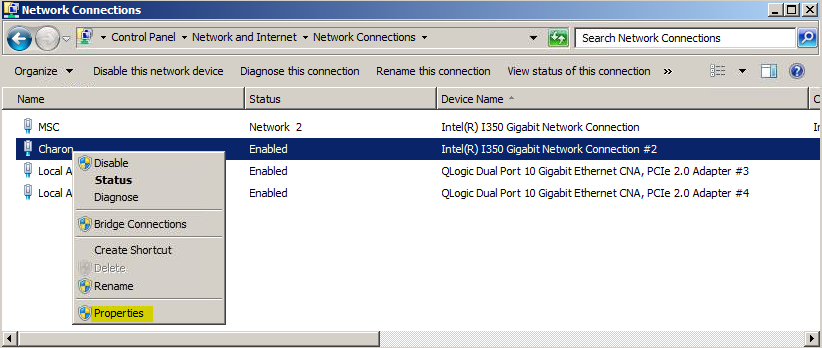
Open up the "Network Connections" applet and select the physical adapter to be used for VLAN creation ("Intel(R) I350 Gigabit Network Connection #2" in our example). Right click the adapter and select "Properties":
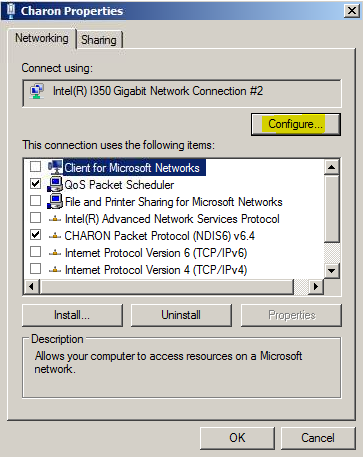
Press the "Configure" button:
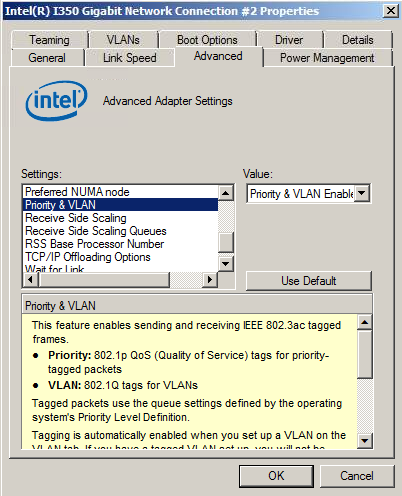
Open up the "Advanced" tab and make sure that "Priority & VLAN Enabled" is selected for "Priority & VLAN":
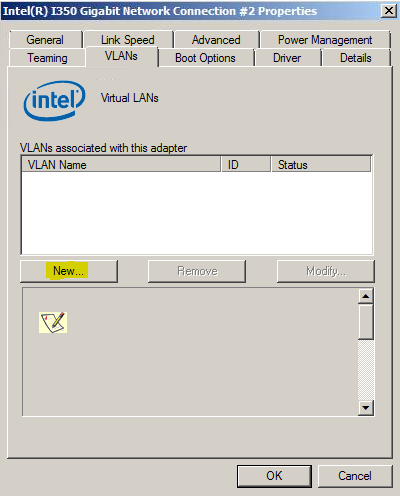
Switch to the "VLANs" tab and click "New":
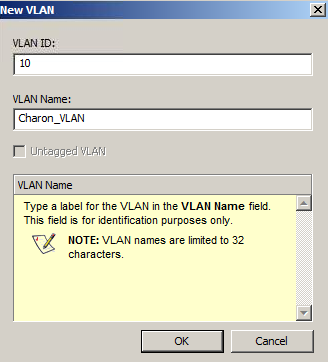
Create a VLAN interface to be used for CHARON (in our example, its ID is 10 and it's named "Charon_VLAN"). Click "Ok" in all the open configuration applets:
Configuring VLAN begins. When complete, the VLAN interface is created:
For convenience of use with CHARON, it is recommended to rename the adapter:

Now it is possible to use the "Charon_VLAN" interface in the CHARON configuration in the following way (after installation of NDIS driver and dedication of this interface to CHARON with the "Network Control Center" utility):
load packet_port/chnetwrk EWA0 interface="connection:Charon_VLAN" |
Links
Find more detailed description on configuration of VLAN on the vendors' web sites:
Related articles
© Stromasys, 1999-2024 - All the information is provided on the best effort basis, and might be changed anytime without notice. Information provided does not mean Stromasys commitment to any features described.