| Include Page | ||||
|---|---|---|---|---|
|
Description
The The BCI2104 card is a PCI card which is used to connect to the old VAX Qbus. When it is used with Charon-VAX with CHAPI option, it is able to let the virtual VAX to see the physical Qbus devices on the legacy Qbus. Then the virtual VAX can use the old devices on the Qbus for operation.
This product comes with several components: The PCI card itself, The Qbus adapter, 2 flat connection cables, one thick cable, and a cable converter. The PCI card is to be inserted the PCI slot of the PC, the Qbus adapter is to be inserted to the Qbus cage. In our test, we used a MicroVAX II to provide the Qbus cage.
Step-by-step guide
Preparation on the Qbus cage
...
- Install Windows 7 (x86) as usual
- Install Charon-VAX as usual
- In the first “Found New Hardware Wizard” window, check “No, not this time” and click “Next”

- In the second screen, choose “Install from a list or specific location (Advanced)” and click “Next”
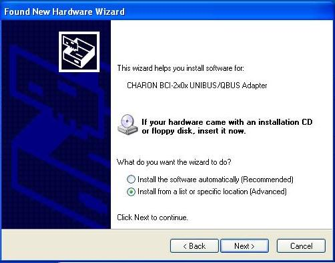
- At the “Search and installation” window, check “Search for the best driver” and also the box “Include this location in the search”, then click the “Browse” button. Select the driver location which should under “C:\Program Files\CHARON\bci2x0x 2.0.1.96” directory. Proceed by clicking OK and then Next

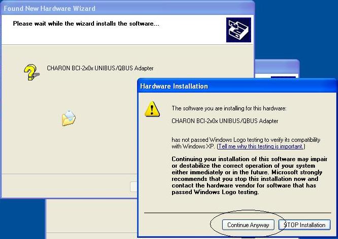
- During the installation, you may hit an installation warning, click “Continue anyway” to keep it install
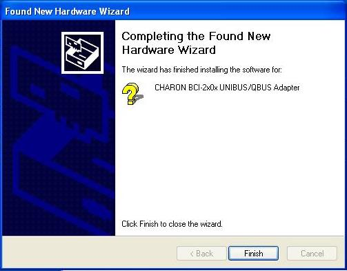
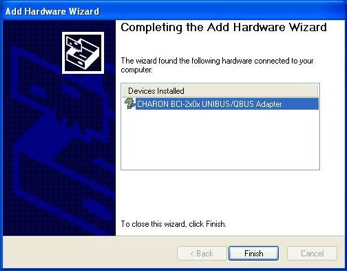
- The driver installation will finish
- After driver installation, it is necessary to move three DLL files:
C:\Program Files\CHARON\Chapi\Chapi_lib_3.2.96\chapi.dllC:\Program Files\CHARON\Chapi\Chapi_lib_3.2.96\chapi_hw.dllC:\Program Files\CHARON\Chapi\chapi_modules_3.2.96\chapi_qbus.dll
To the default installation directoryC:\Program Files\CHARON\Build_96
Configuration
In the config file, add the following line to load the qbus module:
load chapi BCI dll=chapi_qbus.dllSample config file:
##################################Div class commandline set session hw_model="VAX_4000_Model_106"set session log="charon.log" log_method="overwrite"set toy container="charon.dat"set rom container="charon.rom"set ram size=128load virtual_serial_line/chserial OPA0 port=10003 application="opa0.ht"set quart line[3]=OPA0load chapi BCI dll=chapi_qbus.dll# this is the end of the configuration file##################################
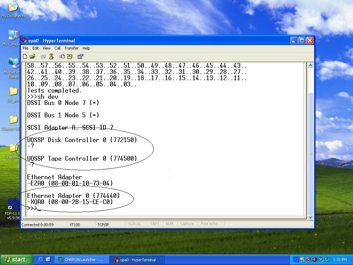
Result
- Power off the PC
- Power on the Qbus cage
- Power on the PC
- Start the Charon launcher
- Choose the config file that is prepared
- Click the “Run selected configuration” to bring out the console
Related articles
| Filter by label (Content by label) | |||||||||||||||||||||
|---|---|---|---|---|---|---|---|---|---|---|---|---|---|---|---|---|---|---|---|---|---|
|
| Include Page | ||||
|---|---|---|---|---|
|