


Running CHARON-AXP for Windows
Table of Contents
Introduction
It is possible to run one or several instances of CHARON-AXP at the same time if your license allows it.
In case of multiple instances, please use only absolute paths and unique names to all the files referenced in the configuration file of each CHARON-AXP instance (log, toy clock, rom files and all the other data such as disk images - all these objects to be discussed later in this document). Also, hardware devices (e.g., CD-ROM) may be used by only one instance at a time (not shared).
For example:
|
Please refer to the next chapters for more details concerning CHARON-AXP configuration details.
Running from a Desktop shortcut
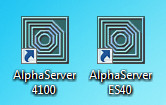
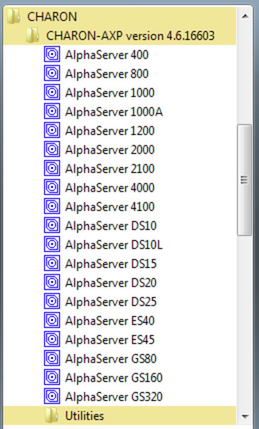
The CHARON installation procedure creates shortcuts on the desktop for so-called "default" HP Alpha models and shortcuts under "Start" menu for all HP Alpha models included during installation.
Desktop shortcuts:
"Start" menu shortcuts:
To run a certain CHARON-AXP model, double click the target model's desktop shortcut (or click on "Start" menu shortcut).
Depending on settings, Windows may display a Firewall warning dialog asking to confirm CHARON access to different networks.
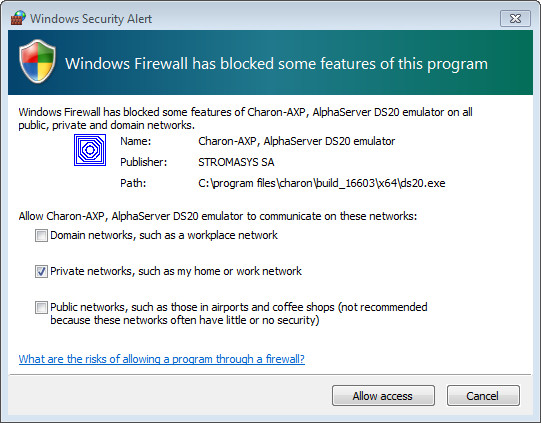
Check the desired options and press "Allow access" button.
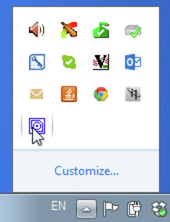
The CHARON icon will appear in the system tray menu:
Next, the HP Alpha emulated console will appear:
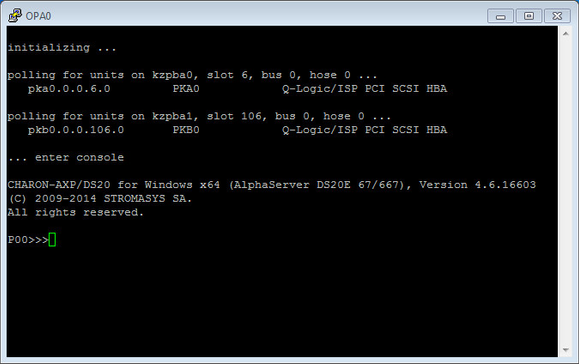
The total number of devices (both controllers and units, including disks) displayed by CHARON SRM console is limited to 48. Note that it does not affect the actual number of configured devices provided to CHARON guest OS.
If the CHARON icon in the system tray menu disappears, it means a critical error happened at run-time. In this case you have to analyze the CHARON log file, by default stored beside CHARON executables. The default location for log files is "C:\Program Files\CHARON\Build_XXX\x64". The name of the log file depends on the model of emulated HP Alpha and the date and time, for example "AlphaServer_1200-2015-01-20-13-40-32-000000000.log"
The easiest way to find the needed log file is to sort all the files in the CHARON executables directory by date of modification.
Generally it is not recommended to use template (sample) configuration files (used in shortcuts) for your configuration since those files are part of the installation and may be deleted by the CHARON installation procedure on modifications or re-installation. It is a good practice to copy the required configuration template from "C:\Program Files\CHARON\Build_XXX\x64" directory to some local file and build the configuration from there.
Once the sample configuration files are copied, CHARON default shortcuts can be changed to use them instead:
- Right click on CHARON shortcut for target HP Alpha model
- Choose "Properties"
- In the "Target" edit box, change the default template configuration file path and name to the local one. For example "C:\My configurations\my_es40.cfg"
- Press "Apply" button
The next step is to install or copy a system disk for CHARON operation. This can be either installation of a new OpenVMS, Tru64 Unix, etc. system using a distributive provided by HP or a transfer of data from an existing HP Alpha system. These possibilities will be discussed in detail in the next chapters.
To exit from CHARON-AXP emulator use the following methods:
- Configuration with no changes to the template configuration file
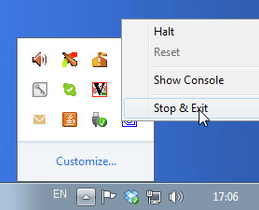
Right click on CHARON icon in the system tray menu, choose "Stop & Exit":
- Type "power off" in CHARON-AXP SRM console
Configuration file updated to enable "F6" button in configuration file to trigger exit from CHARON:
set OPA0 stop_on = F6- To exit, press "F6" in the console window
- Use CHARON icon tray menu as shown above
![]() Before stopping the CHARON-AXP service, shutdown the operating system running in CHARON-AXP.
Before stopping the CHARON-AXP service, shutdown the operating system running in CHARON-AXP.
Running from the Launcher utility
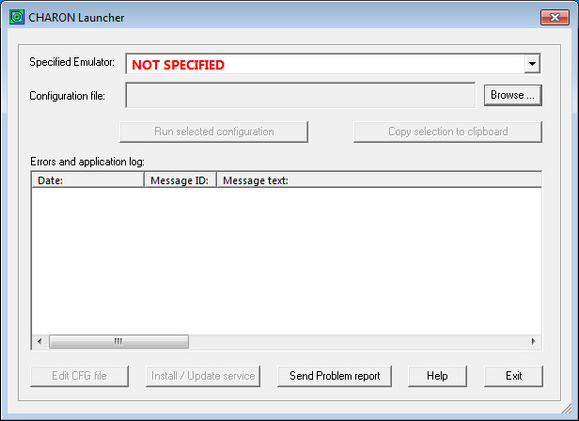
Running from the "CHARON Launcher" utility is very convenient during the debugging of your CHARON configuration. The utility shows CHARON log updates in real time. If RDP is used to connect to the CHARON host, the CHARON may not see the license; start CHARON as a Service instead. From the Launcher, CHARON runs as a User process which will terminate if the User logs off. The Service is a System process and will continue to run until stopped.
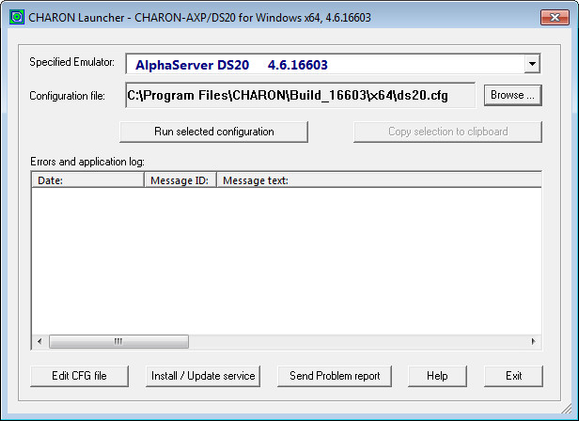
Start the Launcher:

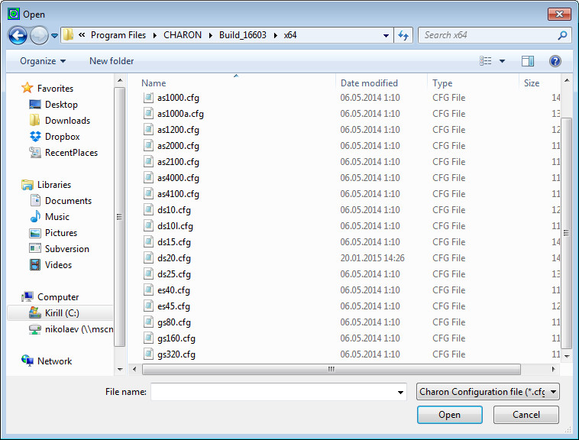
In the Launcher main interface, click the "Browse" button to select the desired CHARON configuration file:
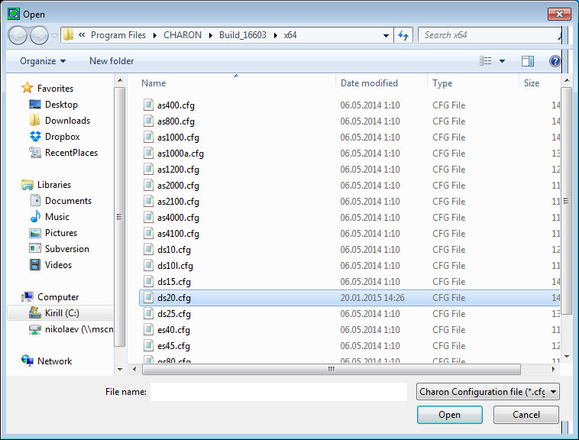
Select the desired configuration file:
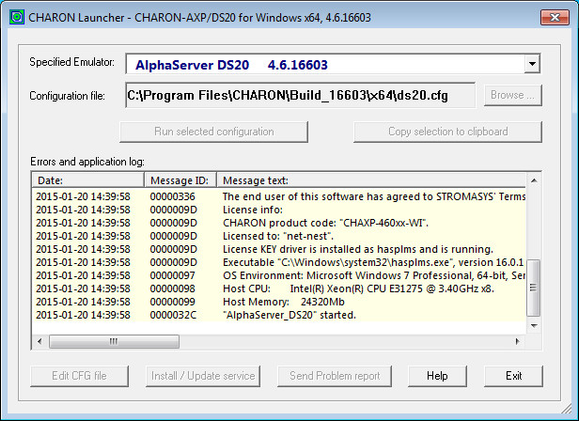
The Launcher will display the CHARON model specified in the selected configuration file:
Now it is possible to run CHARON. Press "Run selected configuration" button.
Depending on system settings, Windows may display a Firewall warning dialog asking to confirm CHARON access to different networks.
Check the desired options and press "Allow access" button.
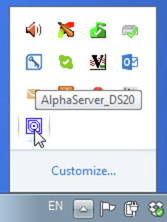
Next, the CHARON icon will appear in the system tray menu:
Right after that the HP Alpha emulated console will appear (in the default configuration. Some configurations may not assume console startup):
The Launcher will display CHARON log file:
It is possible to scroll the log file to analyze possible problems.
To exit from CHARON-AXP emulator use the following methods:
- Configuration with no changes to the template configuration file
Right click on CHARON icon in the system tray menu, choose "Stop & Exit":
Using this menu, it is also possible to halt the virtual HP Alpha, reset it or show its console if it has been closed- Type "power off" in CHARON SRM console
Configuration file updated to enable "F6" button in configuration file to trigger exit from CHARON:
set OPA0 stop_on = F6- To exit, press "F6" in the console window
- Use CHARON icon tray menu as shown above
![]() Before stopping the CHARON-AXP service, shutdown the operating system running in CHARON-AXP.
Before stopping the CHARON-AXP service, shutdown the operating system running in CHARON-AXP.
After CHARON exit press "Exit" button to quit from the Launcher.
Running as system service
It is possible to run CHARON-AXP as a Windows service.
Follow the description below to establish and run CHARON-AXP as Windows service:
Installation and start of CHARON-AXP service
Open the "CHARON Launcher" utility from "Start" menu:
In the "CHARON Launcher" main interface press "Browse" button to select CHARON configuration to be used by CHARON running as Windows service:
Choose the desired CHARON configuration file to be installed as service:
The Launcher will display the specific CHARON model name specified in the configuration file and enable management buttons:
Press "Edit CFG file" button and edit (with standard "Notepad" program) the chosen configuration file:
Use only absolute paths to log, toy clock, nvram files and all the other data such as disk images etc. The names of the references files must be unique too, for example
...set session log="C:\Charon Instances\1st_ds20.log"
set rom container="C:\Charon Instances\1st_ds20.bin"
set toy container="C:\Charon Instances\1st_ds20.dat"set PKA container[0]="C:\Charon Instances\1st_es40_boot_disk.vdisk"...- Make sure the same physical devices are not used by other CHARON-AXP services
Save configuration file with "Notepad" save feature, exit from it.
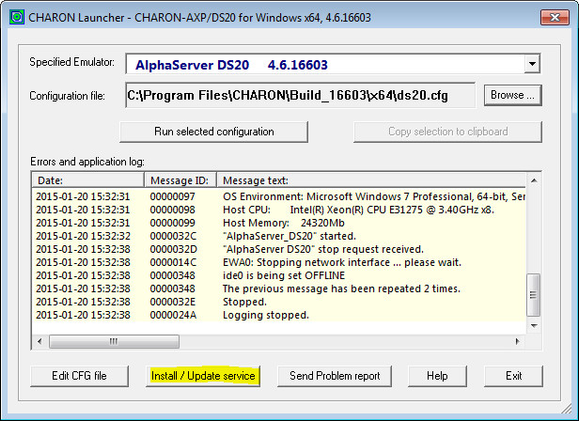
Run the configuration to make sure that it is ready to be installed as Windows service; stop CHARON (see above how to do that).
Press "Install / Update service" button in the Launcher:
A special dialog for adding new CHARON service will appear:
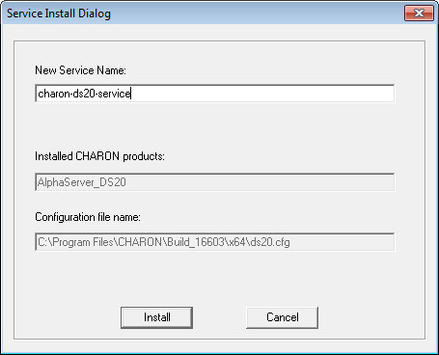
Enter a new service name (in the example above it is "charon-ds20-service") and press "Install" button. If the service has been installed correctly, a configuration dialog box will appear:
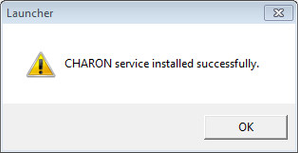
Press "Ok" button then exit from "Launcher" by pressing "Exit" button.
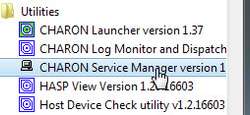
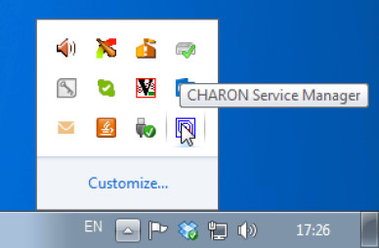
CHARON service is installed, now let's configure it. Start the "CHARON Service Manager" utility:
It is also possible to start the "CHARON Service Manager" utility from the system tray menu:
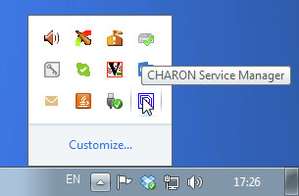
In the main window of the utility, select the target CHARON service ("charon-ds20-service" in our example) and press the "Service" button (labeled with yellow on the screenshot below):

The "Service Management dialog" will appear:

The "Service Management dialog" shows the current status of the selected CHARON service and permits changes to its start up type and to start and stop it. The example screenshot above shows that the service "charon-ds20-service" startup type is "MANUAL" (can be started / stopped only manually) and in the "Stopped" state - these are the default values.
Press the "Start" button to start the service:
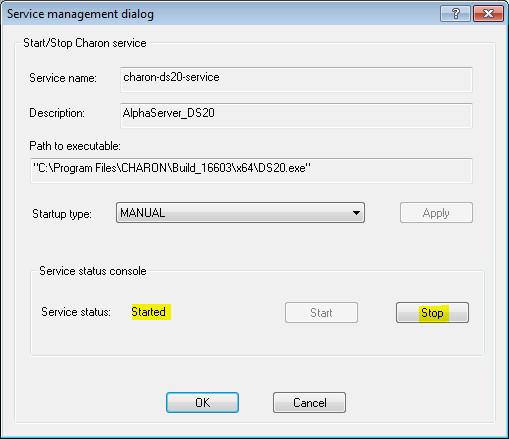
CHARON will start and the Service status will be "Started". To stop the service, press the "Stop" button.
It is possible, and often desirable, to configure the selected CHARON service to start when host operating system starts. To enable this capability, select "AUTOMATIC" in the "Startup type" drop-down box and press the "Apply" button:
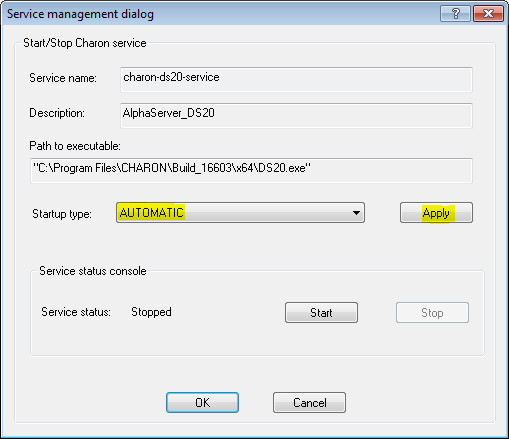
Note that a certain delay may occur before the Sentinel Run-time process finds the network license on CHARON-AXP host system startup. If the CHARON-AXP service is starting automatically on the host system, it may report a "License not found" error and exit.
This problem can be avoided by specifying "license_key_lookup_retry" parameter in the configuration file:
|
where:
- N - Number of retries looking for license key (or keys)
- T - Time between retries in seconds. If not specified 60 seconds is used
Example:
|
In this example, if the license key is not found during the initial scan, CHARON-AXP will scan 5 more times, waiting 60 seconds between them before it stops.
See General Settings section for more details.
Management of CHARON-AXP service
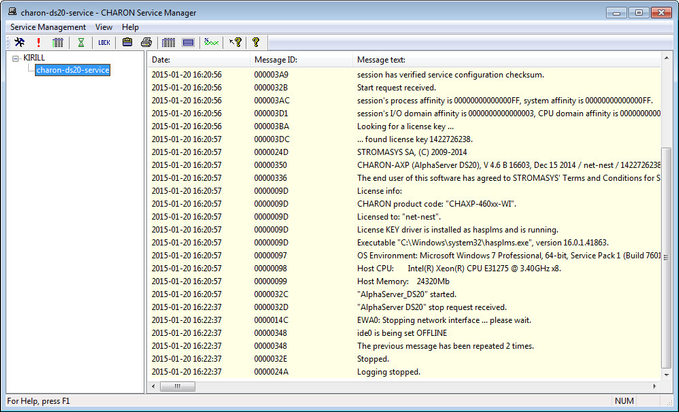
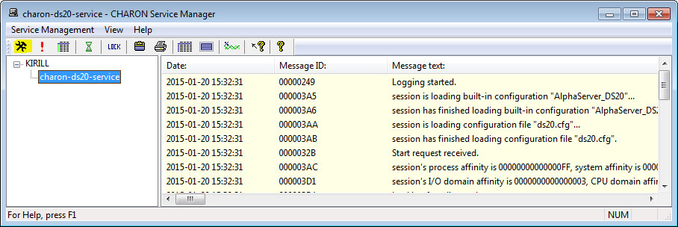
To see the execution log of a CHARON service, select the service ("charon-ds20-service" in the example below) and the current log messages will be displayed in the right panel of the utility interface. You may need to scroll up to see startup/previous messages:
To control execution of CHARON services, open the "CHARON Service Manager" utility from the "Start" menu or use the system tray shortcut to manage the services w/o opening the main window of the utility:
Press the right button of the mouse to see a list of the installed CHARON services ("charon-ds20-service" in our example):

Select the Service to see the list of the available operations:

Explanation:
| Menu Item | Function |
|---|---|
| Start | Start CHARON service |
| Show Console | Show CHARON service console if it has been closed or not active on the automatic service startup |
| Halt | Halt HP Alpha emulator associated with the selected CHARON service |
| Reset | Reset the virtual HP Alpha associated with the selected CHARON service |
| Stop | Stop CHARON service |
| Show Log | Show execution log of the selected CHARON service |
Choose the desired action and click on it.
Stopping CHARON-AXP service
Open up "CHARON Service Manager" utility from the "Start" menu:
or from the system tray menu:
In the main window of the utility, select the target CHARON service ("charon-ds20-service" in our example) and press the "Service" button (labeled with yellow on the screenshot below):
Press the "Stop" button in the resulting dialog box:

The CHARON Service can be Stopped using the shortcut on the Windows Task Bar.
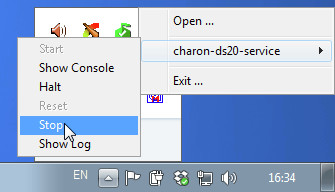
Open up the "CHARON Service Manager" system tray menu, select the service you are going to stop and click on the "Stop" command:
![]() Please note: before stopping the CHARON-AXP service, shutdown the operating system running in CHARON-AXP.
Please note: before stopping the CHARON-AXP service, shutdown the operating system running in CHARON-AXP.
Modification of CHARON-AXP service
Note that it is not enough just to modify the CHARON configuration file associated with a given CHARON service to apply the changes. You must also update the CHARON service with the "Launcher" utility.
Update the CHARON-AXP configuration file for the CHARON service.
Start up the "CHARON Launcher" utility:
In the "CHARON Launcher" utility, select the modified configuration file and run it as described above.
Make sure that the configuration starts without errors, then stop CHARON-AXP as described above.
If errors appear, stop CHARON-AXP, update its configuration file, start it again and make sure that the updated configuration works Ok this time, then stop CHARON-AXP.
Once CHARON-AXP has been completely stopped, press the "Install / Update service" button:
The install / update dialog will appear:

Press "Update existing service" button:
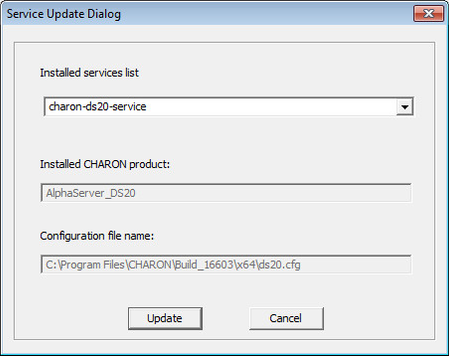
Select the service to update with the "Installed services list" drop-down box and press "Update" to apply.
![]() Service update requires the CHARON-AXP service to be stopped.
Service update requires the CHARON-AXP service to be stopped.
Removing CHARON-AXP service
To remove the CHARON-AXP service, open the "CHARON Service Manager" utility from the "Start" menu:
or from the system tray menu:
![]() Please note: before stopping the CHARON-AXP service, shutdown the operating system running in CHARON-AXP.
Please note: before stopping the CHARON-AXP service, shutdown the operating system running in CHARON-AXP.
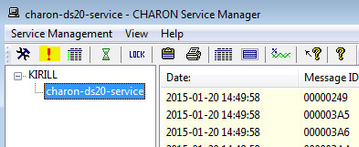
In the main window of the utility, select the CHARON service to remove ("charon-ds20-service" in our example) and press the button with an exclamation sign on it:
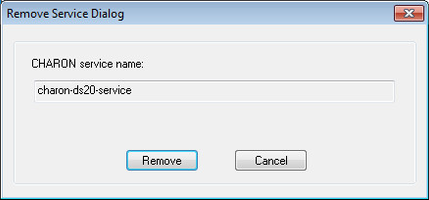
Confirm removal of the selected CHARON service by pressing the "Remove" button:
![]() Please refer to the next chapters for more details concerning CHARON-AXP configuration details
Please refer to the next chapters for more details concerning CHARON-AXP configuration details
© Stromasys, 1999-2024 - All the information is provided on the best effort basis, and might be changed anytime without notice. Information provided does not mean Stromasys commitment to any features described.